Showing posts with label Desserts. Show all posts

Wednesday, December 18, 2013

Mini Pecan Pies

JACKPOT!  Finally!  I have had SO many pinterest fails lately.  Its been ridiculous.  I keep thinking I need to make a list of all the terrible one's!  Maybe soon I will.  I was excited to try this one, and so glad I did because it turned out amazing.  Easy ingredients, easy to make, and delicious to eat!  YAY!


Ingredients:
1 Frozen pie crust, thawed out
1/2 Cup powdered sugar
1/4 Cup butter
1/4 Cup light corn syrup
1/2 Chopped pecans

Directions:
*Flour your counter well so the dough doesn't stick.


*Roll out the pie crust a bit to thin it out.  (Flour the top a bit so the rolling pin doesn't stick).


*Take a small, round cookie cutter or glass to cut out small round pieces of the dough.  I had a small glass I used, but a small 2 inch cookie cutter would be perfect.  Even a 1.5 inch.


*Spray down your mini muffin tin (yes, those super small one's that has 24 or so muffin spots in it) with baking spray.


*Place each of the little pie crusts into a muffin tin spot.  Gently press it down into place.


*Place the tin into a pre-heated oven to 350*F.  Bake for 8-10 minutes.


*While the dough is baking, make the filling.

*Put the powdered sugar, butter, and corn syrup into a very small pan.


*Cook on medium until it boils.

*Add the chopped pecans and mix well.


*Pour the pecan mixture into the pastry cups that are still in the muffin tray.

*Bake for an additional 5-8 minutes in the oven (still at 350*F).

*Remove and let cool before removing from the pan. (I ate them before I could take a picture, oops!)

Tuesday, July 9, 2013

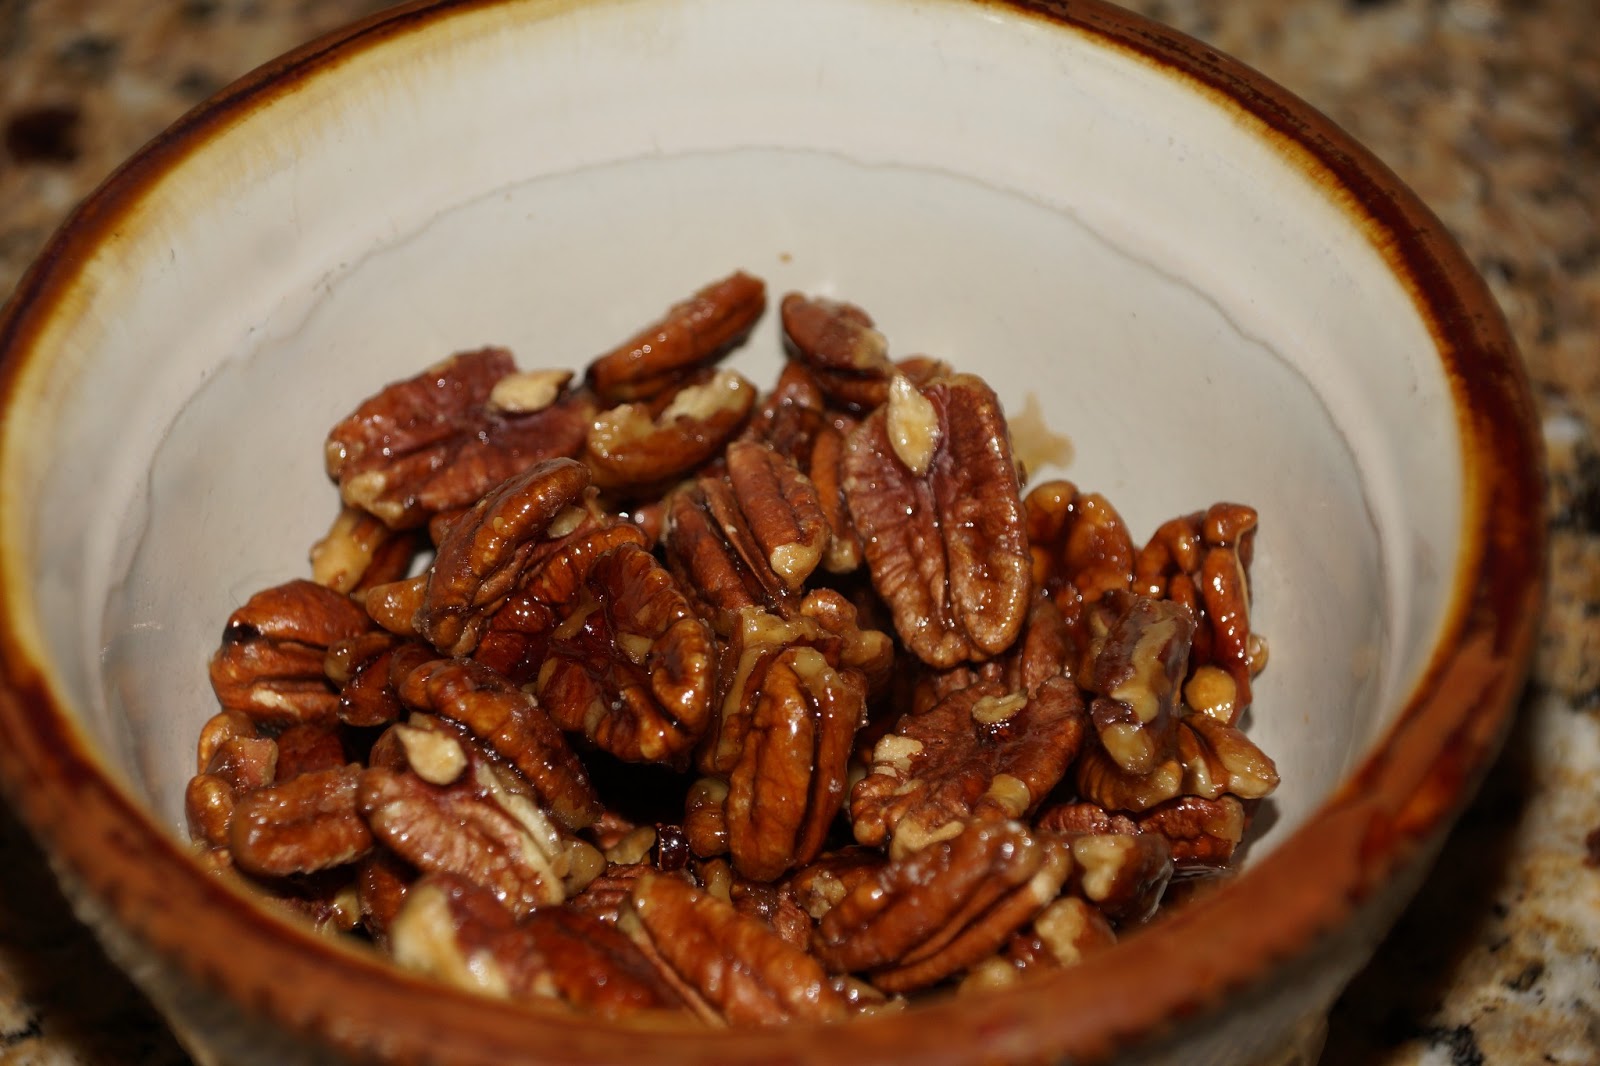
Maple Pecans

Every year my parents get thousands of pecans off the pecan trees that line their driveway.  The driveway itself is 1/4 of a mile long, so you can imagine just how many trees there are.  Nick and my Dad spend days collecting the pecans once they are ready.  Dad will drive them across town to a man who cracks them open and will force them through an air shoot to get all the hard shell pieces off of them.  When we get home we then inspect them to make sure they are all okay, and that all of the shells are off.  Sometimes pieces get stuck in the cracks.  The whole process takes a couple of weeks to do, but its fun to know that the desserts we make started in my parents very own front yard.  Then comes the task of trying to figure out what to use all the pecans for :)  I found a recipe online that seemed really fast and easy so I gave it a try.  It was AWESOME!!!  Last weekend we were at Cabela's and they sell candied almonds/cashews/pecans.  For $4.50 per tiny bag.  I didn't buy it because the price is ridiculous.  These tasted exactly the same and cost less than a dollar to make :)  I'm happy, and yes, I will make this many more times!!!


Ingredients:
2 Cups pecans
1/2 Cup Pure maple syrup (just shy of 1/2 cup really...)
Pinch of kosher salt

Directions:
*Preheat your oven to 350*F

*Pour your pecans into a small/medium bowl.

*Pour the syrup on top of the pecans.  I used a full 1/2 cup and it was a little too much.  I would say use a little less.  I had to keep baking mine over and over to get the syrup to harden.  You wouldn't have to do that if you didn't use too much syrup.  The next time I make it I will pour in just enough to lightly cover the pecans.  I had some syrup pooled at the bottom of my bowl and that meant I probably had too much.


*Add a pinch of salt.


*Mix well

*Pour onto parchment paper.  It MUST be parchment paper.  It will stick and not work if you spray down tinfoil.  Parchment paper is that amazing non stick stuff that I keep telling ya'll you need to get :)

*Spread it out some so that the pecans are not clumped together.


*Bake in the oven for 10-15 minutes.  (Side note: I used too much syrup the first time, so I had to keep baking mine.  When you take it out of your oven it will be bubbling all over the place.  Place it out of the oven to dry.  It doesn't take long to dry, say 10 minutes or so.  Once its dry you will be able to break the pieces off.  If it is still sticky, throw it back in the oven.  I probably had to do my first batch for a total of about 30 minutes because I couldn't get the syrup to fully cook and harden.  It got easier when I put a second piece of parchment paper onto the counter and took the pecans out of the oven and transferred them to the other piece of parchment.  They all hardened really quick then.  This recipe is super easy.  If it doesn't fully harden, cook a few more minutes, and keep doing so.  Really easy, nearly impossible to mess up.  Give it a try!)


Sunday, February 12, 2012

Peanut Butter Mousse

Nick found this recipe online a few weeks ago and saved it.  I bought all the ingredients and forgot about them...until this morning.  If you are planning on making these, give yourself a few hours before you are going to serve them because they need to sit in the fridge for 3 hours before eating!


Ingredients:
16 Oreo cookies
4 Tbsp butter
1 Cup heavy cream (I used 1 small container of it)
8 Ounces of cream cheese (I used Neufatchel because its fat free)
1 Cup creamy peanut butter
1 Cup powdered (confectioners) sugar
1 14 ounce can sweetened condensed milk
1 tsp vanilla extract

Directions:
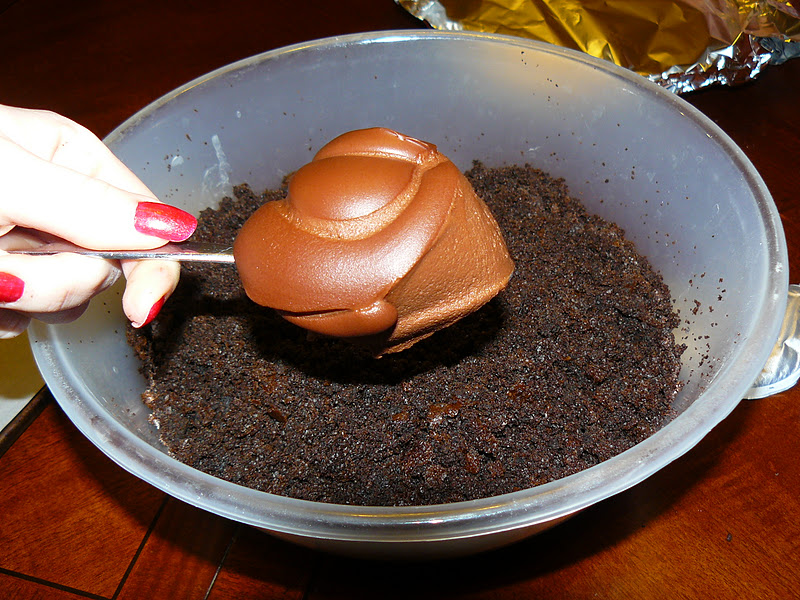
*Place the oreo cookies into a food processor and mix until you have finely ground crumbs.  (My food processor is packed away so I put the cookies into a blender.  It worked fine, just "pulse" the blender/turning it on an off, on and off until all mixed.)

*Pour the cookie crumbs into a small bowl.


*Melt the butter and pour it onto the cookie crumbs.  Mix well.

*Put the crumb/butter mixture into the bottom of the bowls/dishes you want to serve your mousse in.  Press it down into the bottom of each dish.

*Pour your whipping cream into a bowl.  This is the the stuff/size of the whipping cream you need:

*On medium speed, blend the whipping cream until stiff peaks form.  It took me about 5 minutes for mine to form.

*Put the whipping cream into a small bowl and place it in the fridge.

*Put the peanut butter and cream cheese into the empty bowl and mix on medium speed until smooth.  Be SUPER careful if you are using a hand mixer and not using a big electric mixer (like a kitchen aid one)....we BURNED out the motor in ours making these LOL.  So, if you start to smell anything funny or feel like your hand mixer is working too hard, stop for a few minutes then keep going!


*Once the peanut butter/cream cheese mixture is well mixed, slowly add the confectioners sugar.  Mix slowly until well blended. (Note: mixture does not taste like peanut butter...but after the next step it will.  Very strange...)

*Add the vanilla extract and sweetened condensed milk.  Mix on medium speed until smooth and creamy. (Note: NOW it tastes like peanut butter...)


*Mix in half of the whipping cream into the peanut butter mixture.  Blend well.

*Spoon in the remaining whipping cream and stir it with a spatula until mixed in.


*Pour the peanut butter mixture into your dishes, on top of the oreo crumbs.


*If you want to sprinkle on some chocolate crumbs or chocolate chips, do so.


*Put dishes into the fridge for at least 3 hours.  YUMMY!

(Recipe is from: http://www.mybakingaddiction.com/peanut-butter-pie-recipe//)

Saturday, January 7, 2012

Cake Truffles

I made cake pops today...(forgot to take a picture...sorry).  I made so many of the cake balls though that I needed to make something else.  So, here we go: cake balls (truffles?) coated in toffee bits.
Ingredients:
1 box cake mix (I did one that had "pudding in it"...Also, all ingredients needed for the cake)
1/2 tub frosting
1 package Almond Bark (its not almond chocolate...just a silly name for chocolate.)
1 pkg toffee pieces (baking aisle...)

Directions:
*Make the cake according to package...bake it and all.

*Take the cooked cake out of the oven and let it fully cool down.


*Once cool, get a large bowl and break the whole, entire cake into tiny crumbs.


*Add 1/2 the frosting tub into the cake pieces.  Mix well.  I used my hands, it worked better than using a spoon.


*You do NOT wan the cake batter to be sticky.  Just use enough frosting to hold the whole thing together.

*Line a baking sheet with waxed paper or parchment paper.

*Roll the dough into bite-sized balls.

*Place all the balls onto the cookie sheet.

*Cover the cookie sheet with plastic wrap.  Put in the fridge for at least one hour.  I put mine in overnight.

*Once they are cooled, or the next morning, cut your almond bark into smaller chunks.

*Put all the pieces into a microwave safe bowl.

*Put bowl in microwave.  Heat for 20 seconds, then stir.  Then another 20 seconds, stir again.  Do this over and over until melted.

*Once melted, drop one ball at a time into the melted chocolate.  Remove the chocolate coated ball with a fork and place on your lined baking sheet again.

*Drizzle the toffee bits over the tops of the chocolate covered cake balls.  Make sure to do this quickly after removing from the bowl of melted chocolate because they dry pretty quickly!

Chocolate Covered Strawberries

These are so incredibly easy to make.  You will laugh when you see one's in the store and they charge a ton of money for them, because...they are SO easy to make!!!

Ingredients:
Strawberries (a tub of them)
3/4 Bag of chocolate chips (white or brown chocolate)
1/4 Bag of chocolate chips (opposite color as the one above)
OR instead of the second kind of chocolate, you can do sprinkles

Directions:
*Cut all the stems out of your strawberries

*In a microwave safe bowl, place your 3/4 bag of chocolate chips.

*Microwave for 20 seconds.  Stir well.

*Microwave for another 20 seconds.  Stir well again.  Repeat this about 3-4 times until the chocolate is well melted.  Make sure to stir often because chocolate that is not stirred often will burn really easy when in the microwave.

*Once it is all melted, set onto the table or counter where you will be making your strawberries.

*Line a baking sheet with parchment (or waxed) paper.

*Dip a strawberry into the chocolate about 3/4 of the way up the strawberry.  Lay it onto the baking sheet.  I often do a quick flip of the strawberry so the bit of chocolate that drips gets put underneath the berry.

*Coat all of your berries, then do this next step.


*In a microwave safe coffee cup, put a ziplock bag.  Now put your second color of chocolate chips into the bag.

*Microwave for 20 seconds, stir, 20 more seconds, stir, etc...  If you are doing white chocolate for this second step, it often takes white chocolate a bit longer to melt than semi-sweet chocolate does.  Not quite sure why...

*Once the chips are melted, seal the baggie.

*Cut a small tip off the baggie with scissors.


*Start drizzling your chocolate over the berries in a fun design.

Leave on the baking sheet until dry.  I don't put them in the fridge because I find once you pull them from the fridge the chocolate starts to unmelt a bit...  It takes about 2-3 hours for them to fully dry.  They are so good  too!  I often put what is leftover from baggie of melted chocolate into the tops of the strawberries where the hull was.  Hull?  Um, strawberry green stemy thing...  Yum!

Thursday, November 17, 2011

Jello Pretzel Salad

Another pinterest recipe that is OH SO GOOD!  And easy  :)


Ingredients:
1 Big box of strawberry or raspberry jello (we used sugar free)
10-12 Strawberries cut into smaller slivers
2 1/2 Cups chopped up pretzels (as small as you like)
1 1/2 Sticks butter, melted (I used 1 3/4 sticks)
4 Tablespoons brown sugar
1 Pkg cream cheese
1 Cup white sugar
1 Tub cool whip, thawed

Directions:
*Make the jello by boiling 2 cups of hot water.  Mix the hot water with the jello for 2 minutes.  Add the 2 cups of cold water  (I filled a 2 cup measuring cup up with ice, then filled with water so it settled quicker).  Mix well.

*Put the strawberry slices into the jello.


*Put strawberries and jello mixture into the fridge for about an hour to an hour and a half.  You want it to be jiggly without being liquidy or a solid yet.


*When the jello is just about at that perfectly jiggly stage, start these next steps.

*Mix your crushed up pretzels, melted butter, and brown sugar together in a mixing bowl.


*Spray a 9x13 glass dish down with baking spray.

*Pre-heat your oven to 350*F.

*Pour the pretzel mixture into the baking dish and press it all down firmly.  I made sure my edges weren't raised up with pretzel pieces too...just push those little pieces back down.

*Bake for 10 minutes.


*Remove from the oven and set aside until completely cooled (about 15-20 minutes).

*While the pretzels are cooling down, mix your cream cheese and 1 cup of white sugar together.

*Add the tub of cool whip to the sugar and cream cheese.  Mix well.


*Once the pretzels are cooled, pour the cream cheese mixture over it.  Make sure all the edges have the cream cheese mixture all the way to them.  You don't want the next mixture of jello to seep down to the pretzels.  So cover the pretzels well!


*Pour the jello mixture over the cream cheese.  Even it out if need be.


*Put in fridge until jello has settled (about 2 more hours).


Original recipe from here: http://www.the-girl-who-ate-everything.com/2009/07/jello-pretzel-salad.html   but ya'll know I changed it a bit  :)

Tuesday, October 25, 2011

Chocolate Covered Banana Pieces

This recipe is for my friend Alanna!  She "pinned" a picture of the yummiest looking banana pieces that were covered in chocolate onto Pinterest.com.   I saw it and decided I needed to make them.  Unfortunately when I clicked on the link it brought me to a Canadian meat market distributor.  So, I made this up.  It was amazing.  I will without a doubt make these again!  (Please excuse the pictures...I took this one before they chilled and before the chocolate hardened up.  Good thing because we ate them so fast I didn't have time to take a picture!)
Ingredients:
2 Bananas
1 Cup semi-sweet chocolate chips
6-8 Popscicle sticks
Sprinkles or nuts for decorating if you want

Directions:
*Cut your banana into round slices about 1/2 - 3/4 of an inch thick.  Too thin and the popscicle stick will  break the banana slices.

*In a microwave safe bowl, add your chocolate chips.


*Microwave the chips for 20 seconds.  Stir, then microwave another 15 seconds.

*Be careful, chocolate burns easy, so make sure to stir it OFTEN.  Stir every 15 seconds or so.  Burning chocolate chips is a terrible smell!

*Continue to microwave and stir until the chips are melted.

*Line a baking sheet with parchment paper or tin foil.


*Put the popsicle sticks through 2 of the banana pieces.  My pieces still broke a bit, so go slow.  As long as you can pretend to put the banana pieces back together you will be fine.  The chocolate will make them stick back together perfectly.


*Take a spoon and cover your bananas everywhere in melted chocolate.  Any area of banana that is now covered will turn brown because of the air so be careful to cover fronts, backs, sides, and all edges in chocolate.

*Put your chocolate covered banana's onto the baking sheet.  Sprinkle with any toppings you would like (if you want any at all).


*Let air dry for best results.  Air drying will result in the hardest chocolate later. You can put it in the fridge, but as soon as you take it out it will re-melt a bit and go to a mushy chocolate.