So good, worth a try!
Ingredients:
1 Slice of watermelon
1/3 Capful of tequila
Kosher salt
Directions:
*Cut your watermelon into slices.
*Take a fork and poke some holes into the watermelon (be careful not to go all the way through it though).
*I used Jose Cuervo Especial tequila, but you can use any tequila you have.
*Pour some tequila into the bottlles lid/cap.
*Slowly pour about 1/3 of the cap onto the watermelon. It does NOT take much tequila at all.
*Take your coarse kosher salt and sprinkle it on top.
*Eat it up. Its amazing. I don't like tequila and I loved this one!
Showing posts with label Fruit. Show all posts
Monday, June 25, 2012
Wednesday, March 7, 2012
Banana Roll-Ups
Cooper has been in a really "munchy" mood lately. He wants to eat all the time. I'm sick of grabbing crackers or a plain old banana for him. I came up with this as a fun way for him to get a little extra "umph" in his snack...and to hopefully keep him full a little bit longer!
Ingredients:
1 Tortilla
1 Scoop peanut butter
1 Banana
Directions:
*Lay your tortilla down.
*Spread the peanut butter on it (would work better with smooth peanut butter...but Cooper ate all of it this past week so crunchy had to be used!)
*Put the peeled banana onto one side edge of the tortilla and roll it up.
Here is Cooper's "this is a crazy snack" face :)
Ingredients:
1 Tortilla
1 Scoop peanut butter
1 Banana
Directions:
*Lay your tortilla down.
*Spread the peanut butter on it (would work better with smooth peanut butter...but Cooper ate all of it this past week so crunchy had to be used!)
*Put the peeled banana onto one side edge of the tortilla and roll it up.
Here is Cooper's "this is a crazy snack" face :)
Saturday, January 7, 2012
Chocolate Covered Strawberries
These are so incredibly easy to make. You will laugh when you see one's in the store and they charge a ton of money for them, because...they are SO easy to make!!!
Ingredients:
Strawberries (a tub of them)
3/4 Bag of chocolate chips (white or brown chocolate)
1/4 Bag of chocolate chips (opposite color as the one above)
OR instead of the second kind of chocolate, you can do sprinkles
Directions:
*Cut all the stems out of your strawberries
*In a microwave safe bowl, place your 3/4 bag of chocolate chips.
*Microwave for 20 seconds. Stir well.
*Microwave for another 20 seconds. Stir well again. Repeat this about 3-4 times until the chocolate is well melted. Make sure to stir often because chocolate that is not stirred often will burn really easy when in the microwave.
*Once it is all melted, set onto the table or counter where you will be making your strawberries.
*Line a baking sheet with parchment (or waxed) paper.
*Dip a strawberry into the chocolate about 3/4 of the way up the strawberry. Lay it onto the baking sheet. I often do a quick flip of the strawberry so the bit of chocolate that drips gets put underneath the berry.
*Coat all of your berries, then do this next step.
*In a microwave safe coffee cup, put a ziplock bag. Now put your second color of chocolate chips into the bag.
*Microwave for 20 seconds, stir, 20 more seconds, stir, etc... If you are doing white chocolate for this second step, it often takes white chocolate a bit longer to melt than semi-sweet chocolate does. Not quite sure why...
*Once the chips are melted, seal the baggie.
*Cut a small tip off the baggie with scissors.
*Start drizzling your chocolate over the berries in a fun design.
Leave on the baking sheet until dry. I don't put them in the fridge because I find once you pull them from the fridge the chocolate starts to unmelt a bit... It takes about 2-3 hours for them to fully dry. They are so good too! I often put what is leftover from baggie of melted chocolate into the tops of the strawberries where the hull was. Hull? Um, strawberry green stemy thing... Yum!
Ingredients:
Strawberries (a tub of them)
3/4 Bag of chocolate chips (white or brown chocolate)
1/4 Bag of chocolate chips (opposite color as the one above)
OR instead of the second kind of chocolate, you can do sprinkles
Directions:
*Cut all the stems out of your strawberries
*In a microwave safe bowl, place your 3/4 bag of chocolate chips.
*Microwave for 20 seconds. Stir well.
*Microwave for another 20 seconds. Stir well again. Repeat this about 3-4 times until the chocolate is well melted. Make sure to stir often because chocolate that is not stirred often will burn really easy when in the microwave.
*Once it is all melted, set onto the table or counter where you will be making your strawberries.
*Line a baking sheet with parchment (or waxed) paper.
*Dip a strawberry into the chocolate about 3/4 of the way up the strawberry. Lay it onto the baking sheet. I often do a quick flip of the strawberry so the bit of chocolate that drips gets put underneath the berry.
*Coat all of your berries, then do this next step.
*In a microwave safe coffee cup, put a ziplock bag. Now put your second color of chocolate chips into the bag.
*Microwave for 20 seconds, stir, 20 more seconds, stir, etc... If you are doing white chocolate for this second step, it often takes white chocolate a bit longer to melt than semi-sweet chocolate does. Not quite sure why...
*Once the chips are melted, seal the baggie.
*Cut a small tip off the baggie with scissors.
*Start drizzling your chocolate over the berries in a fun design.
Leave on the baking sheet until dry. I don't put them in the fridge because I find once you pull them from the fridge the chocolate starts to unmelt a bit... It takes about 2-3 hours for them to fully dry. They are so good too! I often put what is leftover from baggie of melted chocolate into the tops of the strawberries where the hull was. Hull? Um, strawberry green stemy thing... Yum!
Tuesday, October 25, 2011
Chocolate Covered Banana Pieces
This recipe is for my friend Alanna! She "pinned" a picture of the yummiest looking banana pieces that were covered in chocolate onto Pinterest.com. I saw it and decided I needed to make them. Unfortunately when I clicked on the link it brought me to a Canadian meat market distributor. So, I made this up. It was amazing. I will without a doubt make these again! (Please excuse the pictures...I took this one before they chilled and before the chocolate hardened up. Good thing because we ate them so fast I didn't have time to take a picture!)
Ingredients:
2 Bananas
1 Cup semi-sweet chocolate chips
6-8 Popscicle sticks
Sprinkles or nuts for decorating if you want
Directions:
*Cut your banana into round slices about 1/2 - 3/4 of an inch thick. Too thin and the popscicle stick will break the banana slices.
*In a microwave safe bowl, add your chocolate chips.
*Microwave the chips for 20 seconds. Stir, then microwave another 15 seconds.
*Be careful, chocolate burns easy, so make sure to stir it OFTEN. Stir every 15 seconds or so. Burning chocolate chips is a terrible smell!
*Continue to microwave and stir until the chips are melted.
*Line a baking sheet with parchment paper or tin foil.
*Put the popsicle sticks through 2 of the banana pieces. My pieces still broke a bit, so go slow. As long as you can pretend to put the banana pieces back together you will be fine. The chocolate will make them stick back together perfectly.
*Take a spoon and cover your bananas everywhere in melted chocolate. Any area of banana that is now covered will turn brown because of the air so be careful to cover fronts, backs, sides, and all edges in chocolate.
*Put your chocolate covered banana's onto the baking sheet. Sprinkle with any toppings you would like (if you want any at all).
*Let air dry for best results. Air drying will result in the hardest chocolate later. You can put it in the fridge, but as soon as you take it out it will re-melt a bit and go to a mushy chocolate.
Ingredients:
2 Bananas
1 Cup semi-sweet chocolate chips
6-8 Popscicle sticks
Sprinkles or nuts for decorating if you want
Directions:
*Cut your banana into round slices about 1/2 - 3/4 of an inch thick. Too thin and the popscicle stick will break the banana slices.
*In a microwave safe bowl, add your chocolate chips.
*Microwave the chips for 20 seconds. Stir, then microwave another 15 seconds.
*Be careful, chocolate burns easy, so make sure to stir it OFTEN. Stir every 15 seconds or so. Burning chocolate chips is a terrible smell!
*Continue to microwave and stir until the chips are melted.
*Line a baking sheet with parchment paper or tin foil.
*Put the popsicle sticks through 2 of the banana pieces. My pieces still broke a bit, so go slow. As long as you can pretend to put the banana pieces back together you will be fine. The chocolate will make them stick back together perfectly.
*Take a spoon and cover your bananas everywhere in melted chocolate. Any area of banana that is now covered will turn brown because of the air so be careful to cover fronts, backs, sides, and all edges in chocolate.
*Put your chocolate covered banana's onto the baking sheet. Sprinkle with any toppings you would like (if you want any at all).
*Let air dry for best results. Air drying will result in the hardest chocolate later. You can put it in the fridge, but as soon as you take it out it will re-melt a bit and go to a mushy chocolate.
Tuesday, August 16, 2011
Raspberry Pocket Pie
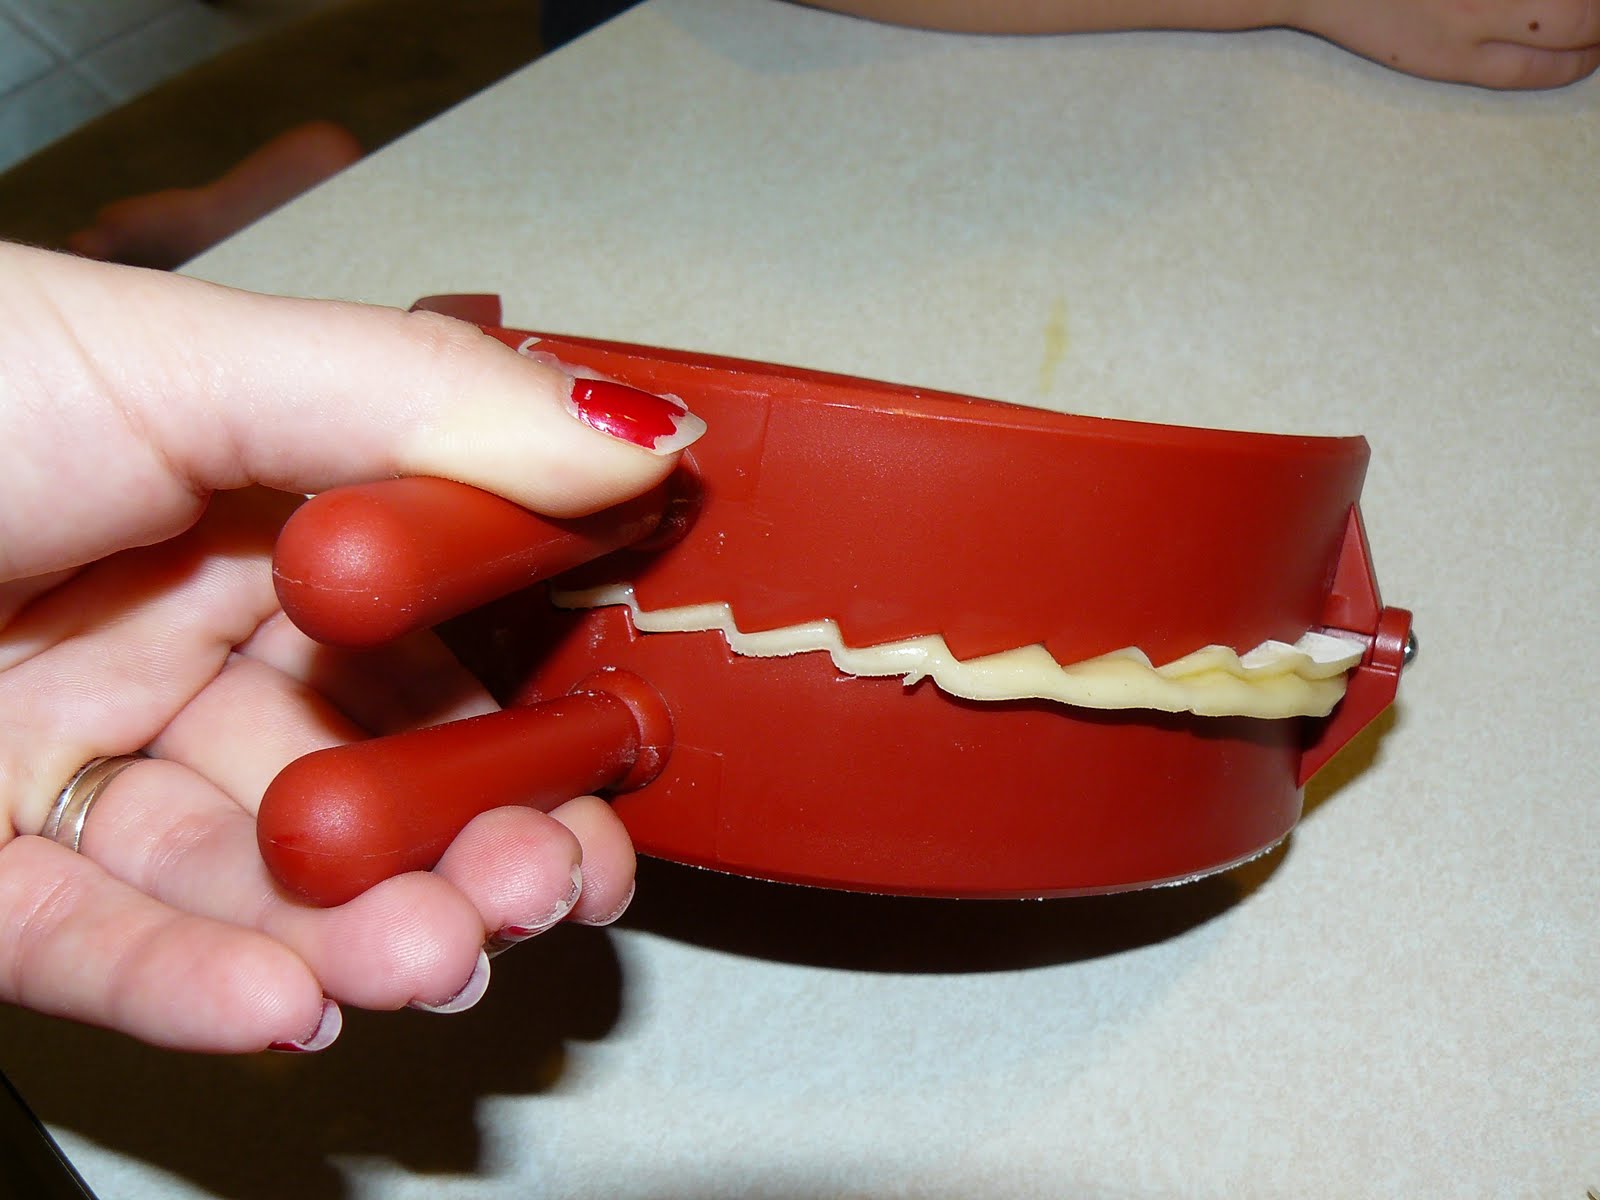
I saw the neatest gadget while at Target today that I couldn't live without! Hah. Anyways, I bought it and then I made the raspberry pie recipe that was on the back of it. If you don't have one of these things, go buy one! It was so easy to use, and Cooper and I had tons of fun making the pies. PLUS...this little gadget was only 5 or 6 dollars! I'm going to try some chicken/broccoli/cheese pie's soon! Oh the possibilities!
Ingredients:
1 Refrigerated pie crust, thawed
1/3 Cup sugar
2 tsp cornstarch
1 Cup of raspberries
1 Egg
Directions:
*Unroll your pie crust onto a slightly floured surface.
*Take your pie mold and open it up. The edge's of mine are sharp so I used that to cut out my circles of pie dough.
*Cut out 3 pie crusts. If you need to, you can mash up your dough, then roll it out again. I could only cut out 2 circles of dough before having to re-roll it out.
*Mix your sugar and cornstarch in a small bowl.
*Put one of your pie doughs onto your pie mold.
*My mold lets me bend one side up a bit so that I don't have the entire circle laying out flat (if that makes sense). I pulled one of the sides up a bit so I knew where my center was.
*Pour a few raspberries into the mold slightly off center on one side.
*Pour 1 Tbsp of the sugar mixture over the berries.
*Take your egg in a small bowl and mix it up.
*I don't have a pastry brush so I used a paper towel to dip into the egg, then rub around the sides of the dough in the pie mold.
*Close your mold and press firmly so that it shuts and is pressed together.
*Pre-heat your oven to 400*F.
*Line a baking sheet with parchment paper.
*Take your pie out of the mold and place it on the parchment paper.
*Make the other 2 pies the same way.
*Once your pies are on your parchment paper, brush the tops with remaining egg.
*Sprinkle sugar onto the tops of each pie.
*Bake for 15 minutes.
Ingredients:
1 Refrigerated pie crust, thawed
1/3 Cup sugar
2 tsp cornstarch
1 Cup of raspberries
1 Egg
Directions:
*Unroll your pie crust onto a slightly floured surface.
*Take your pie mold and open it up. The edge's of mine are sharp so I used that to cut out my circles of pie dough.
*Cut out 3 pie crusts. If you need to, you can mash up your dough, then roll it out again. I could only cut out 2 circles of dough before having to re-roll it out.
*Mix your sugar and cornstarch in a small bowl.
*Put one of your pie doughs onto your pie mold.
*My mold lets me bend one side up a bit so that I don't have the entire circle laying out flat (if that makes sense). I pulled one of the sides up a bit so I knew where my center was.
*Pour a few raspberries into the mold slightly off center on one side.
*Pour 1 Tbsp of the sugar mixture over the berries.
*Take your egg in a small bowl and mix it up.
*I don't have a pastry brush so I used a paper towel to dip into the egg, then rub around the sides of the dough in the pie mold.
*Close your mold and press firmly so that it shuts and is pressed together.
*Pre-heat your oven to 400*F.
*Line a baking sheet with parchment paper.
*Take your pie out of the mold and place it on the parchment paper.
*Make the other 2 pies the same way.
*Once your pies are on your parchment paper, brush the tops with remaining egg.
*Sprinkle sugar onto the tops of each pie.
*Bake for 15 minutes.
Saturday, June 4, 2011
Summer Strawberry Pie
I found this recipe this morning...about 4:30 am to be exact (I couldn't sleep so I decided to do some recipe surfing online). As soon as I saw this one I knew I had to make it! I found it at www.mommyskitchen.net. Anyways, I did change it slightly. I did not add strawberry extract to my sauce like she did (basically because I didn't have any, and didn't want to spend the 3-4 dollars for a dash of something I may never use again). It turned out amazing without it. So...if you have strawberry extract, add a dash to your sauce when you are cooking it. If you don't have any, don't worry (come on people, my recipes are the kinds that you can almost always add something or leave something out!). This is awesome for summer because it is a cold pie. So pretty too!!!
Ingredients:
1 Deep dish frozen pie crust
1 Cup white sugar
1/4 Cup corn starch
1 Box strawberry jello (8 1/2 cup servings...the bigger sized box)
1 1/2 Cups water
1 Tbsp lemon juice
(1/2 tsp strawberry extract if you want)
3 Cups strawberries, cut and cleaned
Directions:
*Turn your oven on to 350*F. Remove your pie crust from the freezer. Using parchment paper or foil, draw then cut a circle the size of the inside bottom of the pie crust. You want the inside bottom to be covered so it doesn't burn while cooking. I traced my pie with an orange crayon then cut it out. I used parchment paper.
*Once you have cut it out, put it inside your pie crust and put pie weights (I don't have these so I used dried peas/beans instead).
*Put the pie with the weights/beans into your oven and bake for 15-20 minutes (until it lightly browns).
*Take the pie crust out of the oven, remove the beans/weights and parchment paper. Let cool on a wire rack.
*While the pie is cooking (or cooling), mix the water, sugar, cornstarch, lemon juice, and jello together. Cook over medium heat until the mixture begins to thicken (it thickens pretty quickly after it starts to boil). Make sure to stir it often (if not constantly).
*Remove from heat once it thickens and let cool for about 45 minutes (you don't want to put it hot over your pie).
*While your sauce is cooling, arrange your strawberries in your pie. I flipped most of them on the top so that the cut part of the berries didn't show (it made it look prettier).
*Once the filling has cooled, pour it over all of the berries in the pie making sure to coat them all.
*Put pie in your fridge for at least 2 hours to set. You can keep the pie in the fridge for up to 3 days. :)
Ingredients:
1 Deep dish frozen pie crust
1 Cup white sugar
1/4 Cup corn starch
1 Box strawberry jello (8 1/2 cup servings...the bigger sized box)
1 1/2 Cups water
1 Tbsp lemon juice
(1/2 tsp strawberry extract if you want)
3 Cups strawberries, cut and cleaned
Directions:
*Turn your oven on to 350*F. Remove your pie crust from the freezer. Using parchment paper or foil, draw then cut a circle the size of the inside bottom of the pie crust. You want the inside bottom to be covered so it doesn't burn while cooking. I traced my pie with an orange crayon then cut it out. I used parchment paper.
*Once you have cut it out, put it inside your pie crust and put pie weights (I don't have these so I used dried peas/beans instead).
*Put the pie with the weights/beans into your oven and bake for 15-20 minutes (until it lightly browns).
*Take the pie crust out of the oven, remove the beans/weights and parchment paper. Let cool on a wire rack.
*While the pie is cooking (or cooling), mix the water, sugar, cornstarch, lemon juice, and jello together. Cook over medium heat until the mixture begins to thicken (it thickens pretty quickly after it starts to boil). Make sure to stir it often (if not constantly).
*Remove from heat once it thickens and let cool for about 45 minutes (you don't want to put it hot over your pie).
*While your sauce is cooling, arrange your strawberries in your pie. I flipped most of them on the top so that the cut part of the berries didn't show (it made it look prettier).
*Once the filling has cooled, pour it over all of the berries in the pie making sure to coat them all.
*Put pie in your fridge for at least 2 hours to set. You can keep the pie in the fridge for up to 3 days. :)
Friday, June 3, 2011
Dessert Chips and Salsa
This is by far the neatest "dessert" I have made. It's healthy, but oh so clever! It's a fruit salad with homemade cinnamon sugar chips. I promise, its worth trying!
Chips:
1 pkg flour tortillas (smallest sized one's...)
1/2 Cup white sugar
2-3 Tbsp's cinnamon
Pot of vegetable oil, or frying oil...whichever you prefer
Directions:
*Put your oil into a pot on the stove and turn onto medium. Let the oil heat up until bubbles begin to rise.
*While your oil is heating up, cut your torillas in half. Now cut each half into 3 pieces (so you have 3 triangles per half slice). You are cutting each tortilla into "pizza" slices pretty much...
*Now drop 4-6 tortilla pieces into your oil and cook for a couple of minutes until they begin to darken. If they are still the white color they won't be crunchy...just be careful not to overdo them...
*Pull the tortilla chips out of the oil now and put them on a plate that has paper towels lined on it. This will absorb the extra oil on the chips.
*You can sprinkle your sugar and then a dash of cinnamon on each chip individually, or you can pre-mix yours (I always have a pre-mixed cinnamon sugar container in my pantry because I actually use this combo all the time...which makes me remember that I have never put my french toast recipe on here...maybe I will do that this weekend!). So if you have an empty spice container, pre-mix the two so that is is mostly sugar with a hint of cinnamon. Cinnamon can be overpowering in flavor so test your mixture until its just right for you.
*Once you have sprinkled the cinnamon and sugar on your chips continue to cook the other chips a bit at a time. Once you get into the hang of cooking in the oil it will go by fast, so don't get discouraged!
Dessert Salsa:
(This is just a basic fruit salad. You can use or not-use any ingredients you want. Here are what we used though).
Ingredients:
1 Cup green grapes
2 Golden delicious apples
1 Pkg strawberries
1 Small can pineapple pieces
2 Cups blackberries
1/3 Cup orange juice
Directions:
*Wash and peel any of the fruits that need to be peeled.
*Cut all of your fruit into smaller, biteable sized pieces.
*Put all of your fruit into a large bowl, and mix them all up. We used orange juice and the pineapple juice that was inside of the can to coat the fruit so that the peeled apples didn't go bad. It was delicious! You can add so many other fruits too!
Other fruits (or one's I forgot to pick up and add to ours...)
Kiwi's
Oranges
Raspberries
Cantaloupe
Honeydew
Peaches
Plums
*Now, when you serve the dish, use the chips to pick up your dessert salsa. Its adorable. My mom got giggly when she saw it. She couldn't stop saying how good it was or how neat of an idea it was.
Chips:
1 pkg flour tortillas (smallest sized one's...)
1/2 Cup white sugar
2-3 Tbsp's cinnamon
Pot of vegetable oil, or frying oil...whichever you prefer
Directions:
*Put your oil into a pot on the stove and turn onto medium. Let the oil heat up until bubbles begin to rise.
*While your oil is heating up, cut your torillas in half. Now cut each half into 3 pieces (so you have 3 triangles per half slice). You are cutting each tortilla into "pizza" slices pretty much...
*Now drop 4-6 tortilla pieces into your oil and cook for a couple of minutes until they begin to darken. If they are still the white color they won't be crunchy...just be careful not to overdo them...
*Pull the tortilla chips out of the oil now and put them on a plate that has paper towels lined on it. This will absorb the extra oil on the chips.
*You can sprinkle your sugar and then a dash of cinnamon on each chip individually, or you can pre-mix yours (I always have a pre-mixed cinnamon sugar container in my pantry because I actually use this combo all the time...which makes me remember that I have never put my french toast recipe on here...maybe I will do that this weekend!). So if you have an empty spice container, pre-mix the two so that is is mostly sugar with a hint of cinnamon. Cinnamon can be overpowering in flavor so test your mixture until its just right for you.
*Once you have sprinkled the cinnamon and sugar on your chips continue to cook the other chips a bit at a time. Once you get into the hang of cooking in the oil it will go by fast, so don't get discouraged!
Dessert Salsa:
(This is just a basic fruit salad. You can use or not-use any ingredients you want. Here are what we used though).
Ingredients:
1 Cup green grapes
2 Golden delicious apples
1 Pkg strawberries
1 Small can pineapple pieces
2 Cups blackberries
1/3 Cup orange juice
Directions:
*Wash and peel any of the fruits that need to be peeled.
*Cut all of your fruit into smaller, biteable sized pieces.
*Put all of your fruit into a large bowl, and mix them all up. We used orange juice and the pineapple juice that was inside of the can to coat the fruit so that the peeled apples didn't go bad. It was delicious! You can add so many other fruits too!
Other fruits (or one's I forgot to pick up and add to ours...)
Kiwi's
Oranges
Raspberries
Cantaloupe
Honeydew
Peaches
Plums
*Now, when you serve the dish, use the chips to pick up your dessert salsa. Its adorable. My mom got giggly when she saw it. She couldn't stop saying how good it was or how neat of an idea it was.
Wednesday, May 18, 2011
Mini Pie's
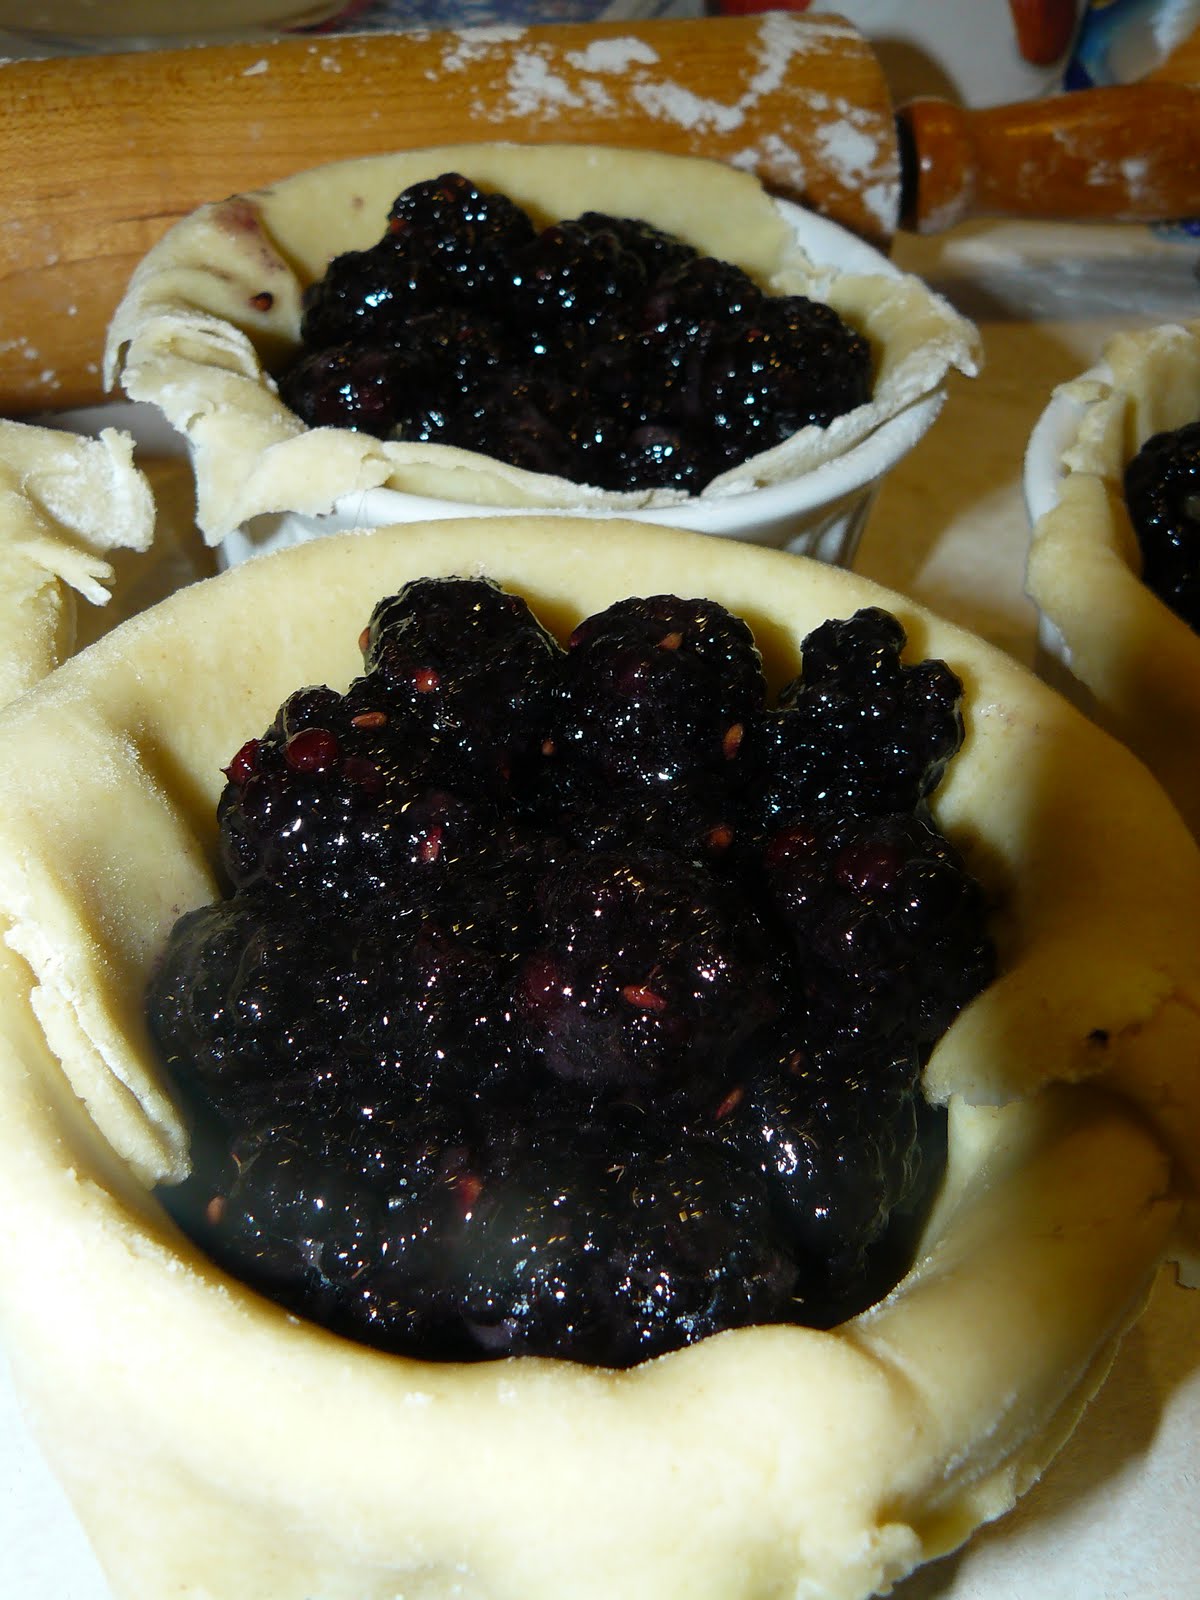
We had some blackberries in our fridge that were reaching their "eat or throw away" point. I didn't think we would eat them all by the time they went bad so I decided to make a pie out of them. You can do this recipe for ANY berry pie (blackberry, raspberry, blueberry)... If you can, make your dough from scratch (Google a pie dough recipe. They are so easy and taste SO much better than frozen or store bought pie dough/crusts). I had 2 packages of pre-made stuff that my grandmother gave me though so I used that instead.
Ingredients:
2 Pkg's dough (or refrigerated, or homemade)
3-4 Cups berries
1/2 Cup sugar
Directions:
*Spray down your ramekins (if you want mini pie's) or a large pie container with cooking spray.
*Mix up your pie dough as directed.
*Sprinkle your counter with flour and roll out your dough to cover the dish/dishes you are going to be using for your pie/pies.
*Put your bottle dough/crust into your dish/dishes.
*In a large bowl, put your berries. Now sprinkle 1/4 a cup of sugar into them and stir it up. If your berries are sweet you probably won't need any more sugar, but if they were tart or sour add more sugar. You can use as much or as little sugar (or sugar substitutes) as you want, just do taste tests to see when it tastes just right. You might use up to about 1/2 a cup or so.
*Now pour this berry mixture into your pie dish/dishes.
*Re-flour your surface and roll out your remaining dough. Put over your pie/pies.
*Since I used ramekins for mine, I let the dough hang off the edge and didn't cut all the side dough off. If your using a basic pie plate your yours, you will want to cut the dough off flush with the edges. I like my dough to go over the edge though (the pie crust is always my favorite part of the whole pie!)
*Using a fork, press the top and bottom edges of the dough together so your filling doesn't overflow.
*Put your pie/pies on a baking dish lined with foil.
*In an oven pre-heated to 425*F, put your baking sheet with pies on it and bake for 10-12 minutes for small ramekins, and up to 15 minutes for a large pie. Just keep an eye on them starting at 8 minutes or so because you don't want them to start to get brown yet.
*After the 10-15 minutes, lower the temperature to 350*F and continue baking for 20-25 minutes for ramekin pies, and 25-35 for a large pie. You know they are done when they begin to brown a bit on the top. There are no ingredients in the pie that need to be cooked to be safe to eat, so if your pie is not fully done you are still fine (as long as the crust is crunchy and flaky you are fine). :)
Ingredients:
2 Pkg's dough (or refrigerated, or homemade)
3-4 Cups berries
1/2 Cup sugar
Directions:
*Spray down your ramekins (if you want mini pie's) or a large pie container with cooking spray.
*Mix up your pie dough as directed.
*Sprinkle your counter with flour and roll out your dough to cover the dish/dishes you are going to be using for your pie/pies.
*Put your bottle dough/crust into your dish/dishes.
*In a large bowl, put your berries. Now sprinkle 1/4 a cup of sugar into them and stir it up. If your berries are sweet you probably won't need any more sugar, but if they were tart or sour add more sugar. You can use as much or as little sugar (or sugar substitutes) as you want, just do taste tests to see when it tastes just right. You might use up to about 1/2 a cup or so.
*Now pour this berry mixture into your pie dish/dishes.
*Re-flour your surface and roll out your remaining dough. Put over your pie/pies.
*Since I used ramekins for mine, I let the dough hang off the edge and didn't cut all the side dough off. If your using a basic pie plate your yours, you will want to cut the dough off flush with the edges. I like my dough to go over the edge though (the pie crust is always my favorite part of the whole pie!)
*Using a fork, press the top and bottom edges of the dough together so your filling doesn't overflow.
*Put your pie/pies on a baking dish lined with foil.
*In an oven pre-heated to 425*F, put your baking sheet with pies on it and bake for 10-12 minutes for small ramekins, and up to 15 minutes for a large pie. Just keep an eye on them starting at 8 minutes or so because you don't want them to start to get brown yet.
*After the 10-15 minutes, lower the temperature to 350*F and continue baking for 20-25 minutes for ramekin pies, and 25-35 for a large pie. You know they are done when they begin to brown a bit on the top. There are no ingredients in the pie that need to be cooked to be safe to eat, so if your pie is not fully done you are still fine (as long as the crust is crunchy and flaky you are fine). :)
Saturday, March 19, 2011
Apple Crisp
By far the best we've ever had! It is FULL of flavors; sweet, tangy, crunchy top, super soft insides...YUM! Looks like a ton of ingredients, but there really is only a few...same ingredients are used in the topping as is used in the filling.
Ingredients:
Topping:
1/2 cup oats
1/2 cup flour
1/4 cup brown sugar
1/4 cup white sugar
1 tsp cinnamon
1/4 cup finely chopped walnuts or pecans
1 stick of butter cut into about 16 pieces
Filling:
4 cups peeled chopped apples (about 2 sweet apples and 2 sour apples (gala and granny smith)
1 tablespoon lemon juice
1/2 cup white sugar
3 TBSP flour
1 tsp cinnamon
Directions:
*Preheat oven to 375
*Topping: Place the oats, flour, brown sugar, sugar, cinnamon, and nuts in a medium bowl and mix. Add the butter and stir well.
*Set topping mixture aside
*Filling: Mix the apples with the lemon juice in a bowl. Add the sugar, flour, and cinnamon. Mix well.
*Pour apple mixture into a shallow baking dish and shake gently to let the fruit settle.
*Spread the topping evenly over the fruit and press down gently.
*Bake for 40-50 mins until the topping is golden brown and filling is bubbling
Ingredients:
Topping:
1/2 cup oats
1/2 cup flour
1/4 cup brown sugar
1/4 cup white sugar
1 tsp cinnamon
1/4 cup finely chopped walnuts or pecans
1 stick of butter cut into about 16 pieces
Filling:
4 cups peeled chopped apples (about 2 sweet apples and 2 sour apples (gala and granny smith)
1 tablespoon lemon juice
1/2 cup white sugar
3 TBSP flour
1 tsp cinnamon
Directions:
*Preheat oven to 375
*Topping: Place the oats, flour, brown sugar, sugar, cinnamon, and nuts in a medium bowl and mix. Add the butter and stir well.
*Set topping mixture aside
*Filling: Mix the apples with the lemon juice in a bowl. Add the sugar, flour, and cinnamon. Mix well.
*Pour apple mixture into a shallow baking dish and shake gently to let the fruit settle.
*Spread the topping evenly over the fruit and press down gently.
*Bake for 40-50 mins until the topping is golden brown and filling is bubbling
Subscribe to:
Posts (Atom)