I bought a set of baking trays/pans from Wilton and this recipe was on the back of the box that held all the pans. I figured it couldn't be too bad if the leading manufacturer of baking pans had it on the back of their boxed set of pans. I was right, these were delicious! I will definitely make them again! (We went to some friends house out of town for the weekend and brought these as a thank you for letting us stay at their house and they were so happy. Our friends also loved them!)
Ingredients:
2 Square's Bakers unsweetened chocolate
3/4 Cup butter, softened
1 1/2 Cups sugar
2 Eggs
1 Cup flour
1 tsp vanilla extract
1/4 tsp salt
Peanut Butter Topping:
1 Cup creamy or crunchy peanut butter (I used crunchy)
1/4 Cup powdered sugar (aka confectioners sugar)
2 Tbsp butter, softened
1 Cup peanut butter chips (found in baking section by the chocolate chips)
Chocolate Drizzle:
1 Cup chocolate chips
1/4 Cup butter softened (I had WAY too much of the chocolate drizzle. You could cut this whole section in half if you don't want to waste anything)
Directions:
*Preheat oven to 350*F.
*Spray bottom of a rectangular cookie pan with baking spray.
*In a small, microwave safe bowl, mix the butter and chocolate chips from the first set of ingredients. Melt them in your microwave starting with 30 seconds. Take out bowl, mix well, put back in microwave for 15 more seconds. Keep doing this until it is melted. Stirring it will melt the chocolate more, AND if you didn't know this, chocolate burns so easy in the microwave so be super careful not to burn it!
*In a mixing bowl, combine the sugar and chocolate/butter mixture. Mix well.
*Add the eggs, salt, flour, and vanilla. Mix well.
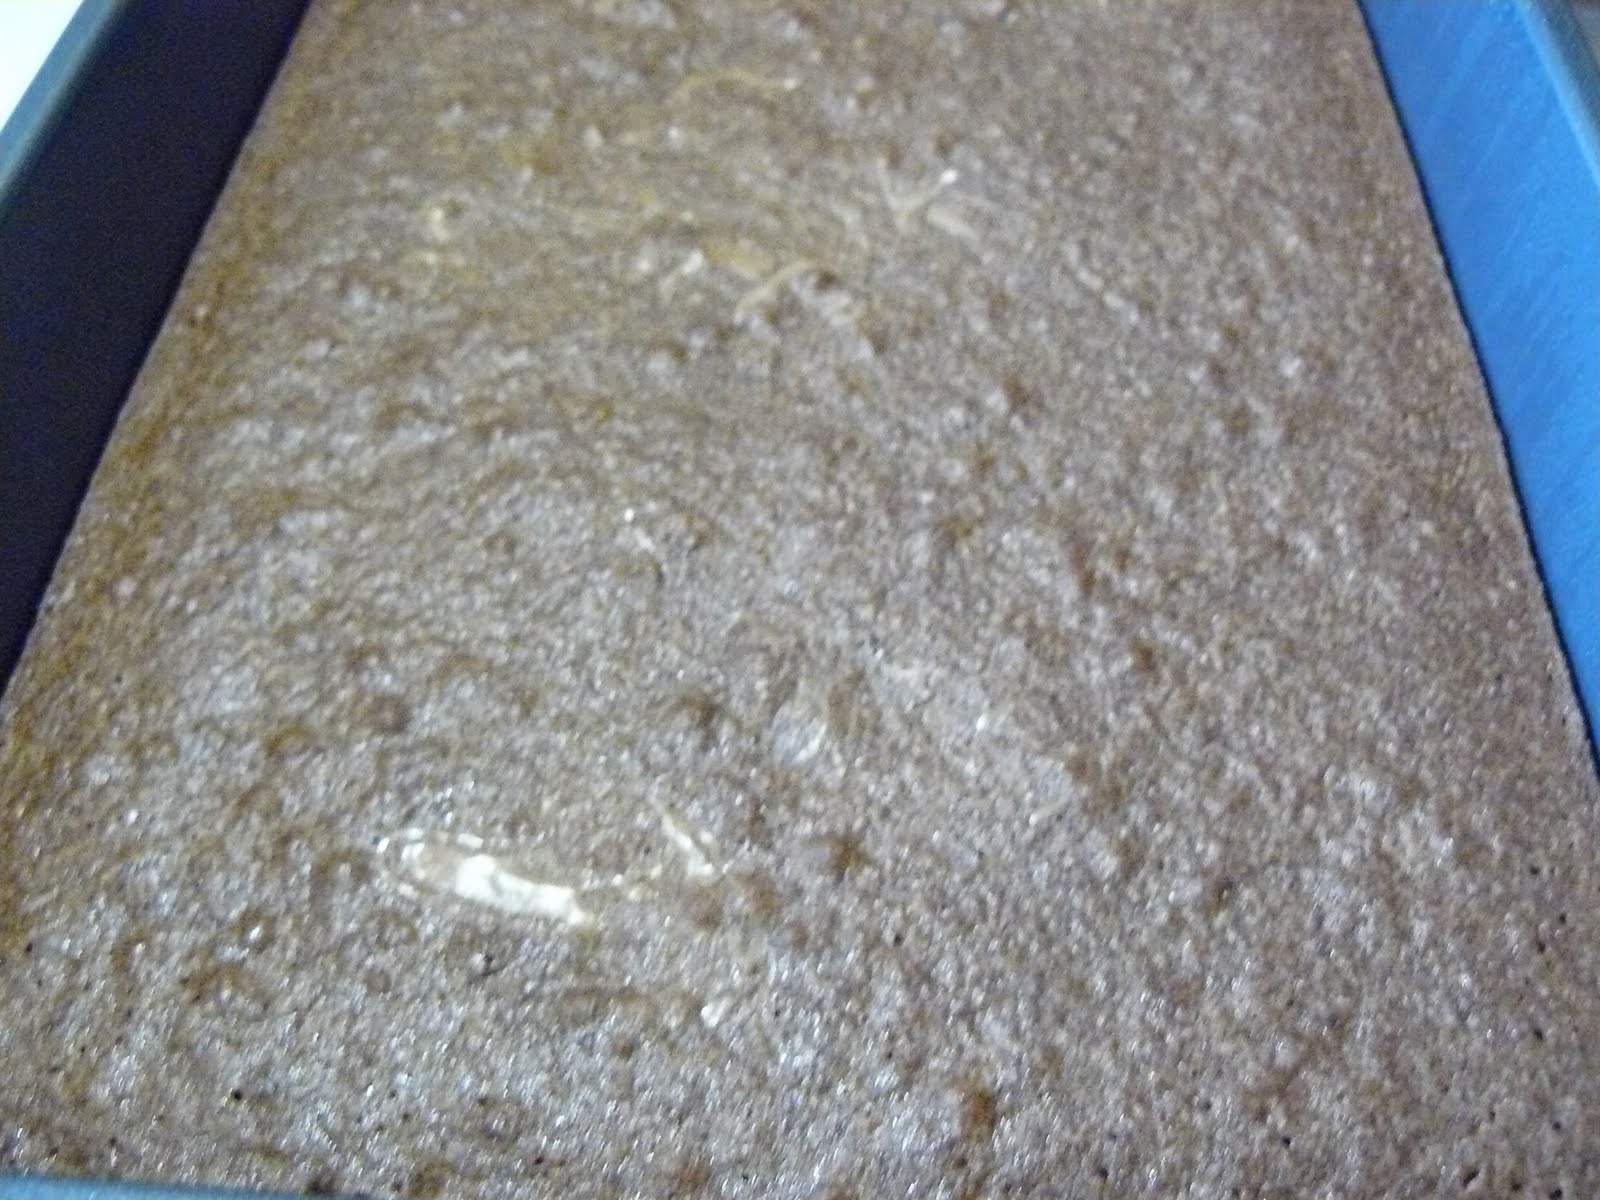
*Pour mixture into the baking dish and spread it out until the bottom of the pan is covered in an even mixture layer.
*Put mixture into the oven and bake 18-20 minutes. Cool for 5 minutes in pan.
*While the mixture is cooking or cooling, make the peanut butter topping.
*To make topping, cream the peanut butter and butter in a small mixing bowl. Now add the sugar and mix until smooth.
*Add the peanut butter chips (I chopped mine up some with a knife so they were smaller pieces) and mix well.
*After your chocolate bottom has cooled for 5 minutes, pour the peanut butter topping on top of it. It takes a few minutes of trying to push and pull the peanut butter to cover the top of the chocolate bottom layer, but as it touches the chocolate cake layer it sort of melts the peanut butter making it easier to move around.
*Once you have it covering the chocolate bottom layer, put the dish back in the oven and bake for another 4-5 minutes.
*Remove from the oven and re-layer the peanut butter mixture if you need too (I just made sure it was an even layer now that the peanut butter chips had melted somewhat).
*Now to make the chocolate drizzle :)
*In a microwave safe bowl, heat the chocolate chips and butter up the same way we did the chocolate the first time. Once the chocolate has melted, get a ziploc bag (small sandwich size), and pour the chocolate into the baggie.
*Close the ziploc bag. Take scissors and cut a TINY corner off one of the bottom corners of the baggie.
*Its super hot to hold the bag, but hey, making pretty desserts can't be easy all the time. So suck it up and do your ouch's and ooh's and get over it!
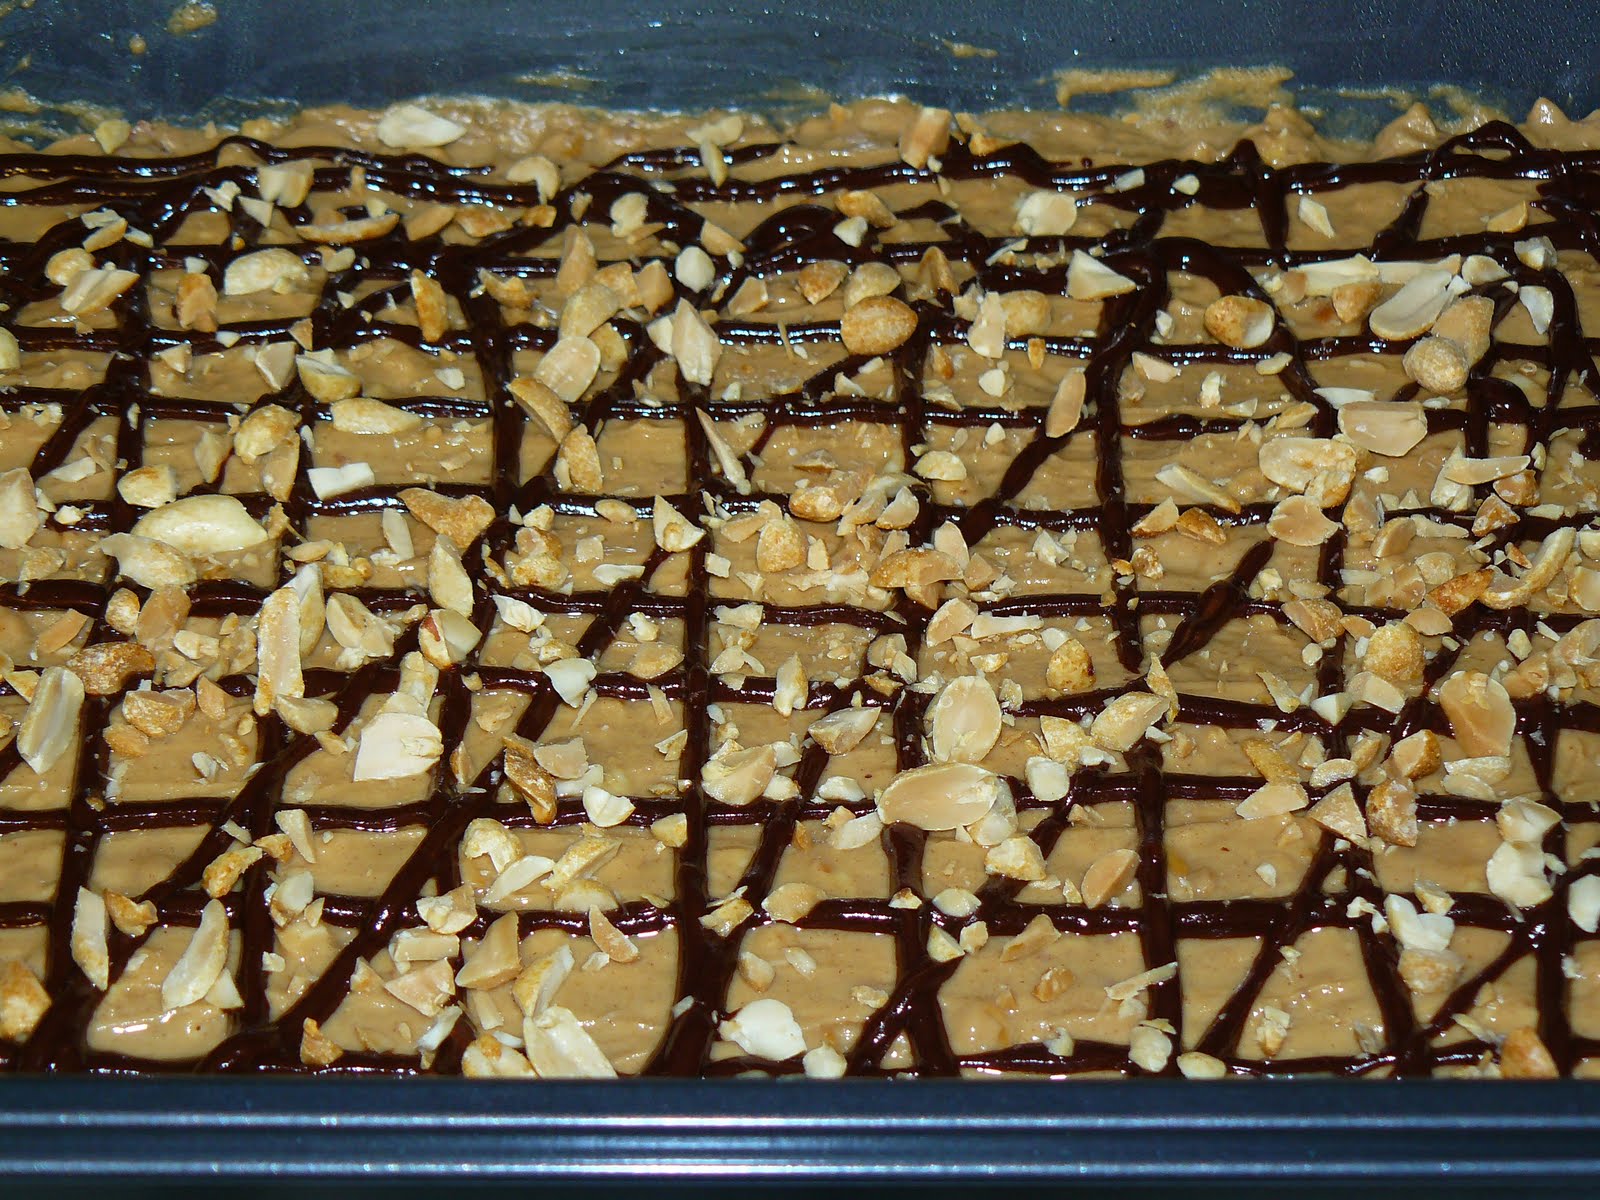
*Drizzle the chocolate up and down the entire length of the pan. Now go the opposite way going up and down. I had enough chocolate that I also did a diagonal too.
*If you have any sort of peanuts, you can chop them up and sprinkle them on top of the chocolate drizzle.
*Cool your bars down completely before cutting them up into bars/pieces.
*Refrigerate once completely cooled and cut.
Sunday, July 31, 2011
Thursday, July 28, 2011
Trail Mix (AKA Middleton Mix)
This is a recipe that my husbands family has been making for years. We love it because its only 3 ingredients, but anyone who tries it can't stop eating it and ALWAYS asks for the recipe! We brought a bag up to Canada with us on vacation and it was gone as soon as we put it out. Its so good!!
Ingredients:
1 Bag on plain M & M's
1 Tub Raisins
1 Canister dry roasted peanuts
Directions:
*Mix all together.
*Yes, it's that easy. And its even yummier, so go ahead and make yourself some! :)
Ingredients:
1 Bag on plain M & M's
1 Tub Raisins
1 Canister dry roasted peanuts
Directions:
*Mix all together.
*Yes, it's that easy. And its even yummier, so go ahead and make yourself some! :)
Monday, July 11, 2011
Vacation...
I just wanted to write a quick note as to why no news recipes have been posted! The past 10 days I have been out at my parents farm while they were on vacation. I didn't do much cooking; nothing worth posting at least. I'm home for a few days before I go on my vacation so I won't be posting for another 2 weeks or so. I'll be back soon though!
Monday, June 20, 2011
Chicken and Biscuits
I found this recipe in an old Food & Family magazine that Kraft used to mail out monthly (now its a subscription). Anyways, I love Kraft recipes because they are good food and SO easy to make. We loved this recipe, and there were no leftovers!
Ingredients:
1 Can cream of chicken soup
3/4 Cup Sour cream
3 Chicken breasts
1 Pkg frozen mixed veggies, cooked
1 Cup shredded cheese, cheddar if you have it
1 Cup baking mix (like bisquick baking mix)
3 Tbsp milk
Directions:
*Cut up your chicken into bite sized pieces and put them in a large skillet with a tablespoon of oil.
*Cook chicken until done (7-10 minutes).
*In a square baking dish, spray it down with baking spray, then pour your can of soup and 1/2 cup of sour cream into it. Mix well.
*Pour the chicken, cheese, and veggies into the soup mixture. Mix well again.
*In a bowl, mix the remaining 1/4 cup of sour cream, baking mix, and milk. Stir until stiff dough forms (about one minute).
*Preheat your oven to 375*F.
*Take your dough and drop it by 4-5 balls of dough onto the top of the soup/chicken mixture. Leave them sitting on the top.
*Bake in the oven for 30-35 minutes; until the biscuits are golden brown.
Another yummy, home-cooked meal to add to my recipe box!
Ingredients:
1 Can cream of chicken soup
3/4 Cup Sour cream
3 Chicken breasts
1 Pkg frozen mixed veggies, cooked
1 Cup shredded cheese, cheddar if you have it
1 Cup baking mix (like bisquick baking mix)
3 Tbsp milk
Directions:
*Cut up your chicken into bite sized pieces and put them in a large skillet with a tablespoon of oil.
*Cook chicken until done (7-10 minutes).
*In a square baking dish, spray it down with baking spray, then pour your can of soup and 1/2 cup of sour cream into it. Mix well.
*Pour the chicken, cheese, and veggies into the soup mixture. Mix well again.
*In a bowl, mix the remaining 1/4 cup of sour cream, baking mix, and milk. Stir until stiff dough forms (about one minute).
*Preheat your oven to 375*F.
*Take your dough and drop it by 4-5 balls of dough onto the top of the soup/chicken mixture. Leave them sitting on the top.
*Bake in the oven for 30-35 minutes; until the biscuits are golden brown.
Another yummy, home-cooked meal to add to my recipe box!
BBQ Cupcakes
I'm posting these because they are the cutest things ever! Not a great "recipe" because its simply a box of chocolate cake...but they are way too fun NOT to post. The kids and I bought Nick a smoker grill for Father's Day and we made these as the dessert for dinner...staying with the whole "smoker/bbq" theme. So...if you are buying your boyfriend/husband/dad a bbq...make these fun little cupcakes to go along with it!
Ingredients:
1 box of chocolate cake mix
1 box hot tamale candy
1 bag gummies (must have reds, yellows, greens inside) I got a pack for one dollar at Walmart...
1 bag chocolate icing (by the cake candles at the store)
Red sprinkles
Silver/tin foil muffin cup liners
Directions:
* Mix your cake batter according to package directions. Only pour the batter into the muffin cups 2/3 of the way because you don't want the cupcakes to overflow...
*Take them out of the oven when done and let them cool. Press down on them with a towel to try and make them not so fluffy! The flatter your tops, the cuter they are!
*Once they are cool, sprinkle all the tops with red sprinkles (this will be the "hot grates" inside your bbq).
*Now put the icing into a small sandwich sized plastic ziploc bag. Cut a TINY hole at the bottom corner to push out the icing.
*Now draw lines (all going the same way) to make the "bbq grates."
*Put a dollop of icing on the back of each hot tamale and place it onto your muffins.
*Using a toothpick, draw lines across the hot tamale to make "grill marks.
*Once you are done with your hot tamale hot dogs, its time to make the kabob squewers.
*Take your gummie candy and cut them into small pieces. Its a sticky mess, sorry.
*Now put them onto toothpicks to make your shishkabobs.
*Put some chocolate icing on the back of each one and put it into place on your muffins.
I hope that special guy you are making these for loves them!!!
Thursday, June 16, 2011
Parmesan Pork Chops
I bought some pork chops a few weeks ago and put them in the deep freeze because I didn't really know what to do with them. I didn't want to simply put them in a baking dish, pour a soup over them, and bake them (its good that way...but I wanted something more creative). While browsing the web today for recipes I stumbled across this one by Giada de Laurentis on the foodnetwork.com website. It was So Good! Definitely a recipe I wanted to post for you guys!
Ingredients:
4 Pork chops, boneless, fat removed/cut off
3/4 Cup Parmesan cheese (grated if you have it)
2 Eggs
3/4 Cup bread crumbs
3 Tbsp vegetable oil
salt
pepper
Directions:
*Put your vegetable oil into a large skillet and turn it on to medium-low.
*Salt and pepper both sides of each pork chop.
*Put the 2 eggs onto a plate and mix them up. On a second plate, put your Parmesan cheese. On a third plate put your breadcrumbs.
*Take your first pork chop and dip both sides and edges into the Parmesan cheese. Pat the cheese onto the meat to secure it on.
*Now put the cheesed up pork chop into the egg, flipping to coat both sides. Now put it into the breadcrumbs. I picked some breadcrumbs up and pressed it onto both sides to make sure they were fully coated.
*Put this coated pork chop onto a plate.
*Do the dipping steps with the other 3 pork chops, putting them all onto the plate once you have finished each one.
*Take a pair of tongs and be SUPER careful for flying oil (it hurts). Put all the pork chops into the skillet. Leave them cook about 6-8 minutes. They will get dark, if not black, and that's okay. Mine were and they tasted fine (not burned), and Giada's on the website were too!
*Once they have cooked on the first side the 6-8 minutes, flip them over and cook the other side for the same amount of time. You can peek to make sure they aren't overly black, but they will be dark! You want them that way!
*You want the inside temperature to be 160*. Mine were getting a little too dark so I pulled them out and put them back onto a plate and cooked them for 1 minute in the microwave. They were still super crispy and finally were cooked through. A tiny bit of pink is now okay on pork (just finished reading a thing from FDA haha).
*So easy, and they were really good!
Ingredients:
4 Pork chops, boneless, fat removed/cut off
3/4 Cup Parmesan cheese (grated if you have it)
2 Eggs
3/4 Cup bread crumbs
3 Tbsp vegetable oil
salt
pepper
Directions:
*Put your vegetable oil into a large skillet and turn it on to medium-low.
*Salt and pepper both sides of each pork chop.
*Put the 2 eggs onto a plate and mix them up. On a second plate, put your Parmesan cheese. On a third plate put your breadcrumbs.
*Take your first pork chop and dip both sides and edges into the Parmesan cheese. Pat the cheese onto the meat to secure it on.
*Now put the cheesed up pork chop into the egg, flipping to coat both sides. Now put it into the breadcrumbs. I picked some breadcrumbs up and pressed it onto both sides to make sure they were fully coated.
*Put this coated pork chop onto a plate.
*Do the dipping steps with the other 3 pork chops, putting them all onto the plate once you have finished each one.
*Take a pair of tongs and be SUPER careful for flying oil (it hurts). Put all the pork chops into the skillet. Leave them cook about 6-8 minutes. They will get dark, if not black, and that's okay. Mine were and they tasted fine (not burned), and Giada's on the website were too!
*Once they have cooked on the first side the 6-8 minutes, flip them over and cook the other side for the same amount of time. You can peek to make sure they aren't overly black, but they will be dark! You want them that way!
*You want the inside temperature to be 160*. Mine were getting a little too dark so I pulled them out and put them back onto a plate and cooked them for 1 minute in the microwave. They were still super crispy and finally were cooked through. A tiny bit of pink is now okay on pork (just finished reading a thing from FDA haha).
*So easy, and they were really good!
Zucchini Casserole
I AM MARTHA STEWART!!! Okay, not really, but this recipe was SOOOOOOOOO good that I felt like I was her! (It's not even a martha recipe...its a Barefoot Contessa recipe, but who's taking note?). I know I've been posting a ton of zucchini recipes lately, and I'm sorry! I don't usually pick one item and cook it over and over, but my parents gave us a TON of it from their garden and I didn't want to waste it. Anyways, back to this recipe. As I was cooking it I kept thinking "what was I thinking making this. Its taking forever for a frigging zucchini recipe. Ugh." BUT THEN...(drumroll please), I added the spices, and BOOM! My kitchen took on the most amazing smell and I got SUPER excited! It turned out so much better than I could have imagined! I cannot wait to make it for others! (So hint, hint friends, someone invite us over so I can bring this dish!). Even Nick kept saying "oh man, this is good" AWESOME!
Ingredients:
6 Tbsp butter (3/4 a stick)
1 Small onion, diced up (original recipe called for 3 onions...but I only used 1 and it was PERFECT!!!)
2 lbs zucchini (about 6 small one's, or 1.5 of my parents big one's)
2 teaspoons salt
1 teaspoon pepper (don't guess on these spices...you need the exact amounts!)
1/4 teaspoon nutmeg (yes, nutmeg. And you HAVE to have it in this recipe!)
2 Tbsps flour
1 Cup HOT milk (put it in your microwave for a minute or two)
3/4 Cup bread crumbs
3/4 Cup - 1 Cup Shredded cheese
2 Tbsp butter
Directions:
*Melt your 6 Tbsps butter over low heat in a large skillet. Once it is melted, add all of the onion pieces. Cook on LOW for about 20-25 minutes (yup, that long). You don't want them to brown, just get soft. So make sure you cook them on low!
*Once the onions are cooked, add the zucchini pieces. Cut them into 1/4 inch round pieces.
*Cook covered for about 15 minutes (until they are tender and cooked). Stir it a few times so it doesn't burn.
*Now add your spices once the zucchini is done. Mix and cook uncovered for about 3-4 minutes. Smell your kitchen, isn't it amazing???!!!
*Now add the 2 Tbsps of flour, then the hot milk. Stir and continue to cook until the milk turns into a semi-thick sauce (about 3-4 minutes). Keep stirring it so it doesn't burn.
*Pour into a baking dish spray down with baking spray.
*In a bowl, mix the bread crumbs and shredded cheese.
*Melt the remaining 2 Tbsps of butter in a cup in the microwave and then put it in with the cheese and breadcrumbs. Mix it up good. Now pour it on top of the zucchini mixture.
*Cook in a pre-heated at 400*F oven for 20 minutes.
*This is one of those recipes you have to try. I HATE onions and I still LOVED this one!!!
(Note: This is my twist on the barefoot Contessa's recipe.)
Ingredients:
6 Tbsp butter (3/4 a stick)
1 Small onion, diced up (original recipe called for 3 onions...but I only used 1 and it was PERFECT!!!)
2 lbs zucchini (about 6 small one's, or 1.5 of my parents big one's)
2 teaspoons salt
1 teaspoon pepper (don't guess on these spices...you need the exact amounts!)
1/4 teaspoon nutmeg (yes, nutmeg. And you HAVE to have it in this recipe!)
2 Tbsps flour
1 Cup HOT milk (put it in your microwave for a minute or two)
3/4 Cup bread crumbs
3/4 Cup - 1 Cup Shredded cheese
2 Tbsp butter
Directions:
*Melt your 6 Tbsps butter over low heat in a large skillet. Once it is melted, add all of the onion pieces. Cook on LOW for about 20-25 minutes (yup, that long). You don't want them to brown, just get soft. So make sure you cook them on low!
*Once the onions are cooked, add the zucchini pieces. Cut them into 1/4 inch round pieces.
*Cook covered for about 15 minutes (until they are tender and cooked). Stir it a few times so it doesn't burn.
*Now add your spices once the zucchini is done. Mix and cook uncovered for about 3-4 minutes. Smell your kitchen, isn't it amazing???!!!
*Now add the 2 Tbsps of flour, then the hot milk. Stir and continue to cook until the milk turns into a semi-thick sauce (about 3-4 minutes). Keep stirring it so it doesn't burn.
*Pour into a baking dish spray down with baking spray.
*In a bowl, mix the bread crumbs and shredded cheese.
*Melt the remaining 2 Tbsps of butter in a cup in the microwave and then put it in with the cheese and breadcrumbs. Mix it up good. Now pour it on top of the zucchini mixture.
*Cook in a pre-heated at 400*F oven for 20 minutes.
*This is one of those recipes you have to try. I HATE onions and I still LOVED this one!!!
(Note: This is my twist on the barefoot Contessa's recipe.)
Tuesday, June 14, 2011
Fried Zucchini
Nick was in charge of dinner tonight. He always comes up with really neat ideas. We weren't hungry since we had a big, late lunch. We wanted beer and munchy type food. His idea: fried zucchini in a beer batter. I was skeptical...until I tried my first bite. It was SO good!!! And we were stuffed. Partly because of how much zucchini it made (see picture below of how big this zucchini from my parents garden was).
Ingredients:
4-5 Regular zucchini's (or one of my parents garden ones LOL)
2 Cups flour
1 Bottle beer (we used a miller lite)
2 Tbsps pepper
2 Tbsps garlic salt
2 Eggs
Directions:
*Mix the flour, beer, pepper, garlic salt, and eggs in a large bowl.
*Cut the zucchini's lengthwise into 4 long slices each (cut off the ends of course).
*Put 4-5 pieces of zucchini into the batter.
*Heat the oil on medium-high heat for about 6-8 minutes. If you drop one single droplet of water into the oil it will sizzle/pop when ready.
*Put the 4-5 pieces of zucchini into the oil and cook until lightly browned. It will take 4-5 minutes for this to happen.
*Remove the zucchini with tongs and place on a place that has a couple of pieces of paper towels lined on it.
*Do the rest of the zucchini the same way.
*Be careful of how hot they are. They will stay super hot for quite a while after too!
*Serve with ranch, ketchup, or any other sauce you might like. These were SO SO SO good! Perfect appetizer if you have friends over!
And now...me being silly with one of them... And to show just how HUGE it was!
Ingredients:
4-5 Regular zucchini's (or one of my parents garden ones LOL)
2 Cups flour
1 Bottle beer (we used a miller lite)
2 Tbsps pepper
2 Tbsps garlic salt
2 Eggs
Directions:
*Mix the flour, beer, pepper, garlic salt, and eggs in a large bowl.
*Cut the zucchini's lengthwise into 4 long slices each (cut off the ends of course).
*Put 4-5 pieces of zucchini into the batter.
*Heat the oil on medium-high heat for about 6-8 minutes. If you drop one single droplet of water into the oil it will sizzle/pop when ready.
*Put the 4-5 pieces of zucchini into the oil and cook until lightly browned. It will take 4-5 minutes for this to happen.
*Remove the zucchini with tongs and place on a place that has a couple of pieces of paper towels lined on it.
*Do the rest of the zucchini the same way.
*Be careful of how hot they are. They will stay super hot for quite a while after too!
*Serve with ranch, ketchup, or any other sauce you might like. These were SO SO SO good! Perfect appetizer if you have friends over!
And now...me being silly with one of them... And to show just how HUGE it was!
Veggie Pasta
I saw a recipe that was basic spaghetti with a can of black beans in it. It got me to thinking (dangerous, I know), and here is what I came up with! It was Delicious! And my house smelled amazing!
Ingredients:
2 Green zucchini's
1/2 Green pepper
1/2 Small onion
3/4 Box Rotini pasta
1/2 Jar spaghetti sauce (or more if you like)
1 Pkg mild italian sausage
1 Can black beans
Directions:
*Cut the zucchini into small bite sized pieces. Put them into a skillet with a bit of oil and cook until done (flip them as needed. Takes about 7-10 minutes cooking on medium heat).
*Take the zucchini out of the pan and set aside. (I just put mine in a small bowl).
*In the skillet, put your meat and onion (cut the onion into tiny pieces). You can buy the italian sausage ground or in casings. I only had the pack of 5, in casings, in my freezer. If you use the casings one, cut a long line on them, the pull out the meat and then throw the casings away. It will chop up like ground meat easily.
*Cook the meat and onions until cooked through.
*Add the green peppers (which you have cut into small pieces) and spaghetti sauce and continue to cook for a few minutes.
*Add the black beans and zucchini to the mixture. Cook through.
*Cook your pasta as directed on box.
*Drain pasta, then throw all the meat mixture into the pasta pot with the drained noodles. Mix it all well. Serve on plates with parmesean cheese and shredded cheese. YUM!
Ingredients:
2 Green zucchini's
1/2 Green pepper
1/2 Small onion
3/4 Box Rotini pasta
1/2 Jar spaghetti sauce (or more if you like)
1 Pkg mild italian sausage
1 Can black beans
Directions:
*Cut the zucchini into small bite sized pieces. Put them into a skillet with a bit of oil and cook until done (flip them as needed. Takes about 7-10 minutes cooking on medium heat).
*Take the zucchini out of the pan and set aside. (I just put mine in a small bowl).
*In the skillet, put your meat and onion (cut the onion into tiny pieces). You can buy the italian sausage ground or in casings. I only had the pack of 5, in casings, in my freezer. If you use the casings one, cut a long line on them, the pull out the meat and then throw the casings away. It will chop up like ground meat easily.
*Cook the meat and onions until cooked through.
*Add the green peppers (which you have cut into small pieces) and spaghetti sauce and continue to cook for a few minutes.
*Add the black beans and zucchini to the mixture. Cook through.
*Cook your pasta as directed on box.
*Drain pasta, then throw all the meat mixture into the pasta pot with the drained noodles. Mix it all well. Serve on plates with parmesean cheese and shredded cheese. YUM!
Sopapilla Cheesecake
I had never heard of sopapilla's until I moved to the South. If you don't know what they are, they are a mexican dessert. They are tortilla's that are cut up, fried, then sprinkled with cinnamon, sugar, and honey. Anyways, this cheesecake caught my attention because of how many great reviews it had. They were all good (and that never happens on a recipe!). So, we tried it today and liked it. It has an extreme cream cheese flavor, so if you don't love cream cheese...you probably won't like this! Store it in your fridge and it will keep for a few days!
Ingredients:
2 Cans crescent rolls (I used regular, non-buttery, less fat ones)
2 Pkg's cream cheese (I used 1 cream cheese and 1 neufatchel)
1 1/2 Cups white sugar
1 1/2 tsp vanilla extract
1/2 Cup melted butter
1/2 Cup white sugar
1 tsp ground cinnamon
1/4-1/2 Cup sliced almonds
Directions:
*Pre-heat your oven to 350*F
*Mix your cream cheese's, 1 1/2 cups white sugar, and vanilla extract until well mixed.
*Open your first container of crescent rolls. Flour your counter really well (these things are SO sticky!). Now lay out your sheet of crescent rolls trying to keep them all attached. Flour a rolling pin (or wine bottle!) and flour the top of the crescents. Roll out until it fits flatly on the bottom of a 9x13 glass baking dish. Make sure to spray your baking dish before putting your crescent roll sheet down in it.
*Once you have put down the crescent roll sheet, pour all of your cream cheese mixture down on top and spread it out. Cover the whole thing in an even layer.
*Now flour everything again and roll out your second can of crescent rolls. Do the same thing you did with the first container, and lay it on top of your cream cheese mixture.
*Melt your butter in a bowl. Pour your 1/2 cup of white sugar and cinnamon into it. Stir well. Stir in your almonds. Mix well again. Now pour this whole mixture on top of the crescent sheet and spread it out to cover the whole thing.
*Put into the oven and bake for about 40-45 minutes. When it is lightly browned and has risen some it it finished. Let it cool completely so it is easier to cut and not so runny!
(NOTE: If you have a can of cherry pie filling, add it to the cream cheese mixture. I am going to do this next time. I think it will give it an AMAZING taste!!!).
(I got the basics of this recipe from allrecipes.com...but of course, I changed it up.)
Ingredients:
2 Cans crescent rolls (I used regular, non-buttery, less fat ones)
2 Pkg's cream cheese (I used 1 cream cheese and 1 neufatchel)
1 1/2 Cups white sugar
1 1/2 tsp vanilla extract
1/2 Cup melted butter
1/2 Cup white sugar
1 tsp ground cinnamon
1/4-1/2 Cup sliced almonds
Directions:
*Pre-heat your oven to 350*F
*Mix your cream cheese's, 1 1/2 cups white sugar, and vanilla extract until well mixed.
*Open your first container of crescent rolls. Flour your counter really well (these things are SO sticky!). Now lay out your sheet of crescent rolls trying to keep them all attached. Flour a rolling pin (or wine bottle!) and flour the top of the crescents. Roll out until it fits flatly on the bottom of a 9x13 glass baking dish. Make sure to spray your baking dish before putting your crescent roll sheet down in it.
*Once you have put down the crescent roll sheet, pour all of your cream cheese mixture down on top and spread it out. Cover the whole thing in an even layer.
*Now flour everything again and roll out your second can of crescent rolls. Do the same thing you did with the first container, and lay it on top of your cream cheese mixture.
*Melt your butter in a bowl. Pour your 1/2 cup of white sugar and cinnamon into it. Stir well. Stir in your almonds. Mix well again. Now pour this whole mixture on top of the crescent sheet and spread it out to cover the whole thing.
*Put into the oven and bake for about 40-45 minutes. When it is lightly browned and has risen some it it finished. Let it cool completely so it is easier to cut and not so runny!
(NOTE: If you have a can of cherry pie filling, add it to the cream cheese mixture. I am going to do this next time. I think it will give it an AMAZING taste!!!).
(I got the basics of this recipe from allrecipes.com...but of course, I changed it up.)
Wednesday, June 8, 2011
Fiesta Nacho's
Yesterday our fridge died. Good thing we have a beer fridge and a full sized deep freeze in the garage so we could save some of our things. Today I had a package of ground beef thawed and had no idea what to cook with it. We finally decided on nacho's...the same kind we have been cooking since we have been in college. I started cooking them and guess what...I didn't have one of the items needed. So I created this. It was super yummy, we will absolutely make it again! Nick called them fiesta nacho's...
Ingredients:
1 lb ground beef
3/4 Bag of tostito chips
1 pkg taco seasoning
1 Can corn, drained
1 Can black beans, drained and rinsed
1 Can rotel, drained
1-2 Cups shredded cheese
(any toppings you would like: salsa, sour cream, jalapeno's, black olives...)
Directions:
*Cook ground beef in a large skillet on the stove.
*Pre-heat oven to 350*F.
*When meat is cooked, add taco seasoning to the meat. Stir well.
*Add the corn, black beans, and rotel to the meat mixture. Stir and cook until hot.
*On a baking sheet lined with tin foil (also sprayed with baking spray), layer your tostito chips.
*Pour all of the meat mixture onto the tops of the chips and spread it out to cover the chips.
*Pour the cheese onto the top of the meat mixture.
*Put in the oven until the cheese melts (3-5 minutes)
*Serve with any toppings you would like.
Ingredients:
1 lb ground beef
3/4 Bag of tostito chips
1 pkg taco seasoning
1 Can corn, drained
1 Can black beans, drained and rinsed
1 Can rotel, drained
1-2 Cups shredded cheese
(any toppings you would like: salsa, sour cream, jalapeno's, black olives...)
Directions:
*Cook ground beef in a large skillet on the stove.
*Pre-heat oven to 350*F.
*When meat is cooked, add taco seasoning to the meat. Stir well.
*Add the corn, black beans, and rotel to the meat mixture. Stir and cook until hot.
*On a baking sheet lined with tin foil (also sprayed with baking spray), layer your tostito chips.
*Pour all of the meat mixture onto the tops of the chips and spread it out to cover the chips.
*Pour the cheese onto the top of the meat mixture.
*Put in the oven until the cheese melts (3-5 minutes)
*Serve with any toppings you would like.
Monday, June 6, 2011
Stained Glass Cookies
I'm not going to lie...the hippie in me TOTALLY came out today! These tie-dyed cookies are so much fun to make! Cooper and I had so much fun making them, they truly were an art project in themselves. The probably won't get an award for best tasting cookie, but they are worth making (especially if you have kids). There are only 5 ingredients so you can't go wrong!
Ingredients:
1/2 Cup softened butter
1/2 Cup powdered sugar
3/4 tsp vanilla extract
1 Cup flour
food coloring
Directions:
*Combine butter, sugar, and vanilla extract in a bowl with an electric mixer until all ingredients are mixed.
*Now add the flour and mix until soft balls of dough form.
*Separate the dough pieces into 4 different bowls. Make sure there is the same amount in each bowl.
*Add about 20 drops of food coloring to each bowl, making sure each bowl is a different color. I used a red, a yellow, a green, and a blue.
*Using a spoon or a spatula (making sure it is clean each time you change it from bowl to bowl), mix up the dough a bit so that the dye is somewhat mixed before handling it.
*Once you have somewhat blended the color into the dough, give one bowl at a time to your kiddo and have them mix the dough until no white dough remains. Wash hands, then do another color until each bowl has been thoroughly mixed.
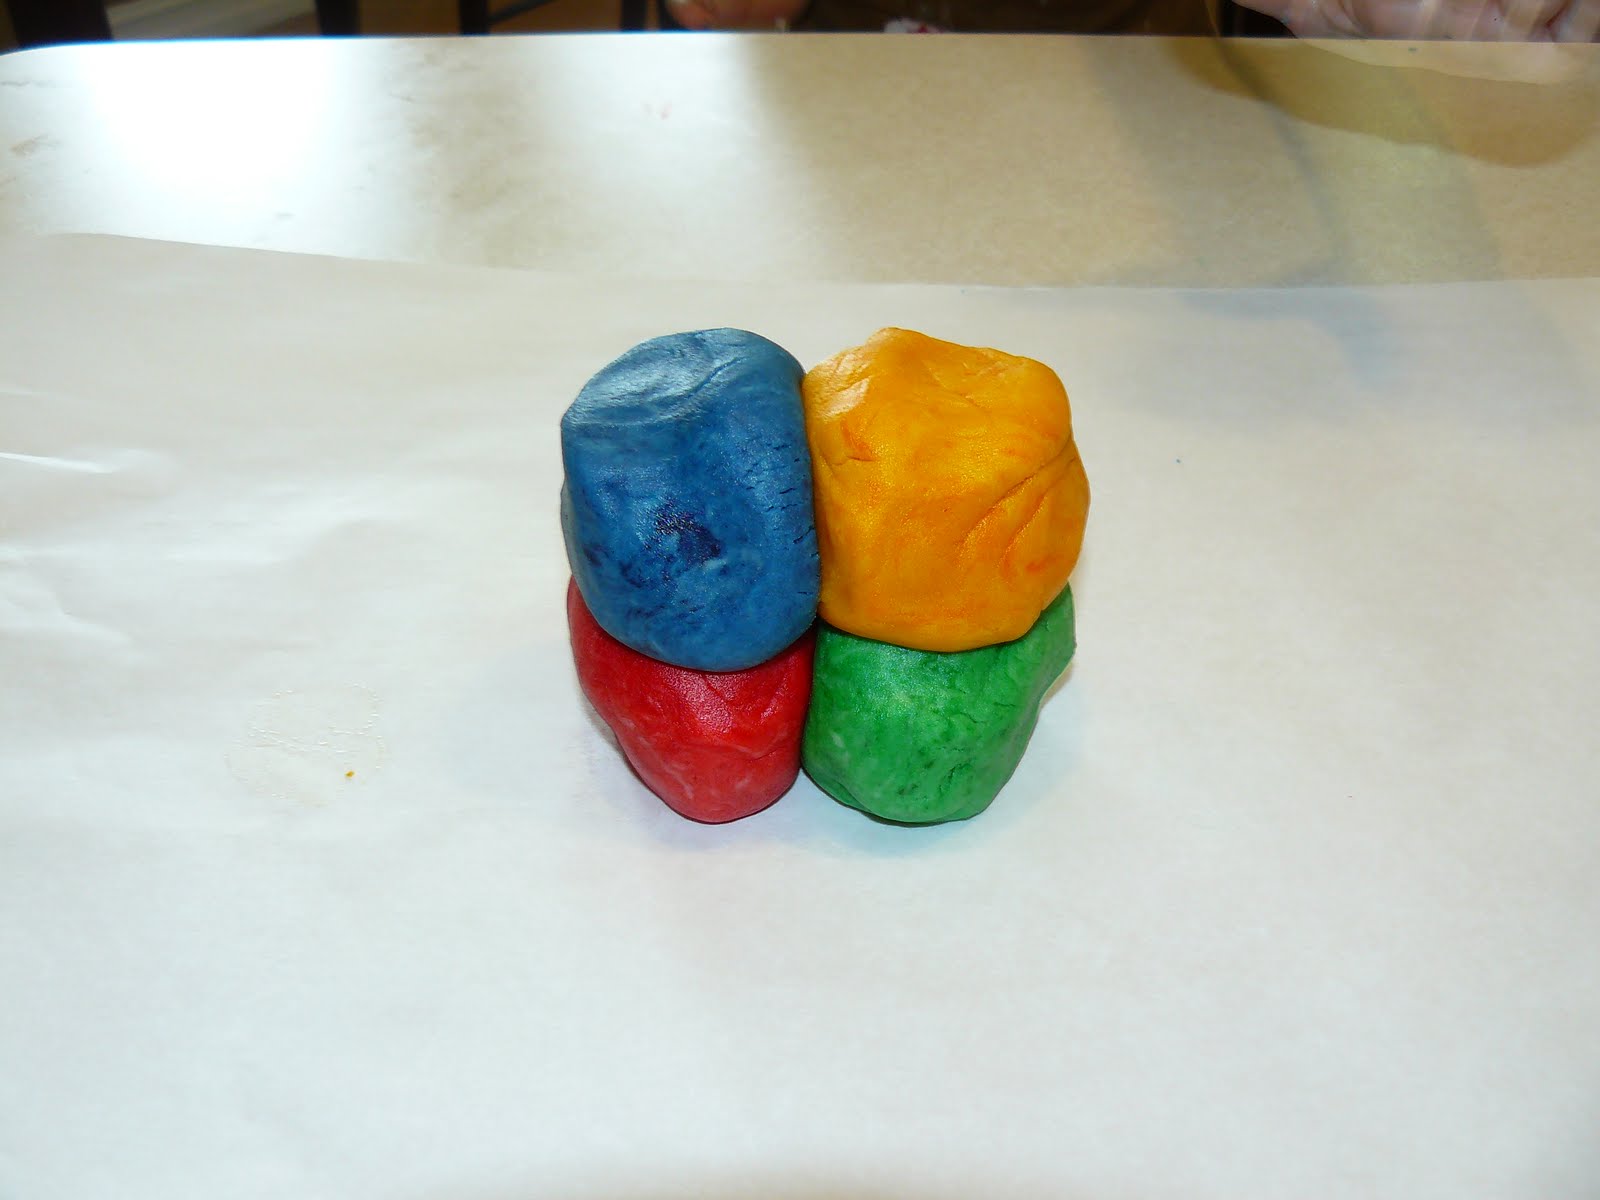
*Once you have your 4 different colored doughs, lay them on a piece of parchment paper on top of one another like this:
*Push down on the dough and mash it a few times to blend it up a bit.
* Then roll it into your parchment paper. When you roll it into the parchment paper it makes it so easy to roll it into the 8 inch log that you need.
*Put your dough into the fridge for 20 minutes.
*Pre-heat your oven to 350*F.
*Take the parchment paper off your dough and place the parchment paper onto a baking sheet. No need to spray the parchment paper with oil (I love this stuff because of that reason!)
*Cut your dough into 1/4 inch thick circular slices and place them on the baking sheet.
*Once all the pieces are cut and on a baking sheet (or two), put them in the oven and bake for 10-12 minutes. I did mine for 10 minutes...but will probably do them for 11 next time. They don't expand at all so don't expect very big cookies! Nice as a small snack! Enjoy!
Ingredients:
1/2 Cup softened butter
1/2 Cup powdered sugar
3/4 tsp vanilla extract
1 Cup flour
food coloring
Directions:
*Combine butter, sugar, and vanilla extract in a bowl with an electric mixer until all ingredients are mixed.
*Now add the flour and mix until soft balls of dough form.
*Separate the dough pieces into 4 different bowls. Make sure there is the same amount in each bowl.
*Add about 20 drops of food coloring to each bowl, making sure each bowl is a different color. I used a red, a yellow, a green, and a blue.
*Using a spoon or a spatula (making sure it is clean each time you change it from bowl to bowl), mix up the dough a bit so that the dye is somewhat mixed before handling it.
*Once you have somewhat blended the color into the dough, give one bowl at a time to your kiddo and have them mix the dough until no white dough remains. Wash hands, then do another color until each bowl has been thoroughly mixed.
*Once you have your 4 different colored doughs, lay them on a piece of parchment paper on top of one another like this:
*Push down on the dough and mash it a few times to blend it up a bit.
* Then roll it into your parchment paper. When you roll it into the parchment paper it makes it so easy to roll it into the 8 inch log that you need.
*Put your dough into the fridge for 20 minutes.
*Pre-heat your oven to 350*F.
*Take the parchment paper off your dough and place the parchment paper onto a baking sheet. No need to spray the parchment paper with oil (I love this stuff because of that reason!)
*Cut your dough into 1/4 inch thick circular slices and place them on the baking sheet.
*Once all the pieces are cut and on a baking sheet (or two), put them in the oven and bake for 10-12 minutes. I did mine for 10 minutes...but will probably do them for 11 next time. They don't expand at all so don't expect very big cookies! Nice as a small snack! Enjoy!
Subscribe to:
Posts (Atom)