This...Stuff...Is...Awesome!!! It is so incredibly easy to make too!!!
Ingredients:
1 lb hot/spicy ground Italian sausage
1 Can rotel in juice (do not drain the juices)
1 Pkg cream cheese
Directions:
*In a pan on the stove, cook the sausage until cooked. Drain fat/liquid.
*Empty the rotel and juice and the cream cheese into the meat. Mix well.
*Heat the mixture through. Serve with chips. SO EASY!!!
(NOTE: We put ours into a small crockpot to keep it warm. No need to cover it, and it doesn't get ridiculously hot like you would expect. You want it served warm.)
Sunday, February 12, 2012
Peanut Butter Mousse
Nick found this recipe online a few weeks ago and saved it. I bought all the ingredients and forgot about them...until this morning. If you are planning on making these, give yourself a few hours before you are going to serve them because they need to sit in the fridge for 3 hours before eating!
Ingredients:
16 Oreo cookies
4 Tbsp butter
1 Cup heavy cream (I used 1 small container of it)
8 Ounces of cream cheese (I used Neufatchel because its fat free)
1 Cup creamy peanut butter
1 Cup powdered (confectioners) sugar
1 14 ounce can sweetened condensed milk
1 tsp vanilla extract
Directions:
*Place the oreo cookies into a food processor and mix until you have finely ground crumbs. (My food processor is packed away so I put the cookies into a blender. It worked fine, just "pulse" the blender/turning it on an off, on and off until all mixed.)
*Pour the cookie crumbs into a small bowl.
*Melt the butter and pour it onto the cookie crumbs. Mix well.
*Put the crumb/butter mixture into the bottom of the bowls/dishes you want to serve your mousse in. Press it down into the bottom of each dish.
*Pour your whipping cream into a bowl. This is the the stuff/size of the whipping cream you need:
*On medium speed, blend the whipping cream until stiff peaks form. It took me about 5 minutes for mine to form.
*Put the whipping cream into a small bowl and place it in the fridge.
*Put the peanut butter and cream cheese into the empty bowl and mix on medium speed until smooth. Be SUPER careful if you are using a hand mixer and not using a big electric mixer (like a kitchen aid one)....we BURNED out the motor in ours making these LOL. So, if you start to smell anything funny or feel like your hand mixer is working too hard, stop for a few minutes then keep going!
*Once the peanut butter/cream cheese mixture is well mixed, slowly add the confectioners sugar. Mix slowly until well blended. (Note: mixture does not taste like peanut butter...but after the next step it will. Very strange...)
*Add the vanilla extract and sweetened condensed milk. Mix on medium speed until smooth and creamy. (Note: NOW it tastes like peanut butter...)
*Mix in half of the whipping cream into the peanut butter mixture. Blend well.
*Spoon in the remaining whipping cream and stir it with a spatula until mixed in.
*Pour the peanut butter mixture into your dishes, on top of the oreo crumbs.
*If you want to sprinkle on some chocolate crumbs or chocolate chips, do so.
*Put dishes into the fridge for at least 3 hours. YUMMY!
(Recipe is from: http://www.mybakingaddiction.com/peanut-butter-pie-recipe//)
Saturday, January 7, 2012
Cake Truffles
I made cake pops today...(forgot to take a picture...sorry). I made so many of the cake balls though that I needed to make something else. So, here we go: cake balls (truffles?) coated in toffee bits.
Ingredients:
1 box cake mix (I did one that had "pudding in it"...Also, all ingredients needed for the cake)
1/2 tub frosting
1 package Almond Bark (its not almond chocolate...just a silly name for chocolate.)
1 pkg toffee pieces (baking aisle...)
Directions:
*Make the cake according to package...bake it and all.
*Take the cooked cake out of the oven and let it fully cool down.
*Once cool, get a large bowl and break the whole, entire cake into tiny crumbs.
*Add 1/2 the frosting tub into the cake pieces. Mix well. I used my hands, it worked better than using a spoon.
*You do NOT wan the cake batter to be sticky. Just use enough frosting to hold the whole thing together.
*Line a baking sheet with waxed paper or parchment paper.
*Roll the dough into bite-sized balls.
*Place all the balls onto the cookie sheet.
*Cover the cookie sheet with plastic wrap. Put in the fridge for at least one hour. I put mine in overnight.
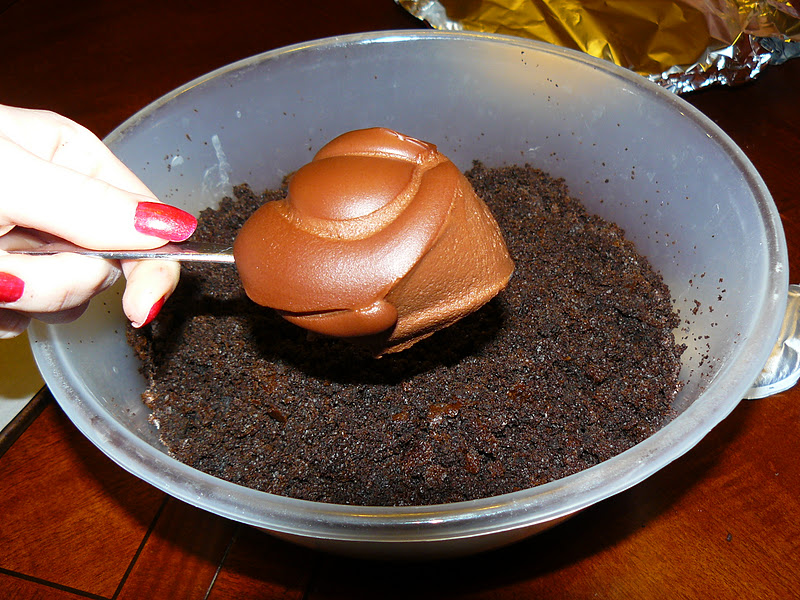
*Once they are cooled, or the next morning, cut your almond bark into smaller chunks.
*Put all the pieces into a microwave safe bowl.
*Put bowl in microwave. Heat for 20 seconds, then stir. Then another 20 seconds, stir again. Do this over and over until melted.
*Once melted, drop one ball at a time into the melted chocolate. Remove the chocolate coated ball with a fork and place on your lined baking sheet again.
*Drizzle the toffee bits over the tops of the chocolate covered cake balls. Make sure to do this quickly after removing from the bowl of melted chocolate because they dry pretty quickly!
Cajun Fried Fish
We made fish and chips for dinner tonight. DELICIOUS as Cooper would say. He told us "I'm allergic to fish." No, your not, just try it. He did.... "YUM, I love fish." HAHA.
Ingredients:
2 Large catfish pieces/filets.
Vegetable oil for frying
1 Cup flour
1/4 Cup cajun seasoning (We used "Slap Yo Mamma" seasoning...so good)
1 tsp Pepper
1 Cup beer. We used Miller light.
Directions:
*In a bowl, mix your flour, spices, and pepper.
*Once mixed, add your beer. Mix again.
*Cut your fish fillets into smaller pieces.
*Dredge your fish pieces into a small amount of flour to coat. The beer/spice mixture will adhere better if your fillets are coated in a bit of flour.
*Put your oil into a large pan/skillet on the stove. Turn heat onto medium. Put a tiny bit of water onto your fingertips. Shake your fingers off over the oil. If the water "pops" and boils, your oil is ready for frying. Be super careful, and also, don't turn your heat on too high, it will burn your food and is really dangerous! Be patient!!!
*Coat your fish pieces into the beer batter.
*Put 4-5 pieces of the coated fish into the oil. Be careful they don't touch one another...they won't cool properly!
*Cook each side until they darken to a nice medium brown color.
*Flip all fish pieces.
*Line a plate with paper towels.
*Put your cooked fish pieces onto the plate.
*Serve with a smidgen of lemon juice if you want! Enjoy!!
Homemade Spicy Man Fries
Another one of Nicks creations. Super yummy!
Ingredients:
8 Potatoes (we used small/medium sized ones)
2 Egg whites
1 1/2 tsp Chili powder
1 1/2 tsp Cumin
1 1/4 tsp Paprika
2 tsp Italian seasoning
1 1/4 tsp salt
Vegetable oil
Directions:
*Pre-heat oven to 430*F.
*Peel, wash, then dry the potatoes.
*Cut your potatoes into 1/2 inch square pieces. You want your pieces to be pretty close in size.
*Put all the potatoes pieces into a bowl.
*In a small bowl, break the eggs and only keep the egg whites. Here is a picture to show you how to get just the egg white. You need to be careful when you break the egg not to open the yolk part. Then, flip flop the yolk back and forth between the two shell halves.
*Lightly beat the egg whites with a whisk.
*In a different bowl, combine all the spices.
*Coat the potatoes in the egg whites.
*Sprinkle the spices over the potatoes. We did NOT use all of the spices. Toss the potatoes well so they are all coated.
*Put a layer of veggie oil onto the baking sheet. We lined ours with tin foil first. Use a good amount...these suckers STICK! We used baking spray. I don't suggest it because they still stuck. So put a good amount of oil to coat the bottom.
*Place the coated potato wedges on the cookie sheet. Spread them out.
*Put them in the oven for 5-7 minutes. Take out of the oven, move them around, flip them up. Drizzle with a bit of oil if they are sticking...ours did a bit.
*Put back into the oven and bake for 40 minutes total, flipping every 5-8 minutes throughout the cooking process.
These were SO good. They were such a fresh taste on homemade fries! We served them with homemade fish sticks that were fried. I'll post the recipe in a minute!
We got the recipe from here: http://zoomyummy.com/2011/11/09/man-approved-spicy-oven-fries/
Chocolate Covered Strawberries
These are so incredibly easy to make. You will laugh when you see one's in the store and they charge a ton of money for them, because...they are SO easy to make!!!
Ingredients:
Strawberries (a tub of them)
3/4 Bag of chocolate chips (white or brown chocolate)
1/4 Bag of chocolate chips (opposite color as the one above)
OR instead of the second kind of chocolate, you can do sprinkles
Directions:
*Cut all the stems out of your strawberries
*In a microwave safe bowl, place your 3/4 bag of chocolate chips.
*Microwave for 20 seconds. Stir well.
*Microwave for another 20 seconds. Stir well again. Repeat this about 3-4 times until the chocolate is well melted. Make sure to stir often because chocolate that is not stirred often will burn really easy when in the microwave.
*Once it is all melted, set onto the table or counter where you will be making your strawberries.
*Line a baking sheet with parchment (or waxed) paper.
*Dip a strawberry into the chocolate about 3/4 of the way up the strawberry. Lay it onto the baking sheet. I often do a quick flip of the strawberry so the bit of chocolate that drips gets put underneath the berry.
*Coat all of your berries, then do this next step.
*In a microwave safe coffee cup, put a ziplock bag. Now put your second color of chocolate chips into the bag.
*Microwave for 20 seconds, stir, 20 more seconds, stir, etc... If you are doing white chocolate for this second step, it often takes white chocolate a bit longer to melt than semi-sweet chocolate does. Not quite sure why...
*Once the chips are melted, seal the baggie.
*Cut a small tip off the baggie with scissors.
*Start drizzling your chocolate over the berries in a fun design.
Leave on the baking sheet until dry. I don't put them in the fridge because I find once you pull them from the fridge the chocolate starts to unmelt a bit... It takes about 2-3 hours for them to fully dry. They are so good too! I often put what is leftover from baggie of melted chocolate into the tops of the strawberries where the hull was. Hull? Um, strawberry green stemy thing... Yum!
Thursday, January 5, 2012
Italian Chicken Soup
Here is a recipe by the Pioneer Woman that we really liked! I found it online and made it soon after. Of course, a few of the ingredients have been changed up a bit... It is also a bit time consuming, but it makes a TON of soup so it will last a few lunches and/or dinners. Totally worth trying it! Enjoy!
Ingredients:
3/4 Box of SMALL noodles (any shape). I used Mini Piccolini by Barilla)
1 Tbsp olive oil
4 Large chicken breasts
8 Cups chicken broth (low sodium)
3/4 Medium onion
1-2 Green peppers (I used just shy of 2 full one's because I love green peppers)
2 Stalks of celery
1 Tbsp oil (I separated the oil by order of when you need it in the directions...)
28 Ounces of diced tomatoes, undrained
1 1/2 - 2 Cups heavy cream
1/3 Cup extra virgin olive oil
2-3 Tbsp's dried oregano (super important spice, cannot leave this one out)
Salt and pepper to taste (just add it at the end)
Parmesan cheese for serving on top...and crusty bread!
Directions:
*Cook your pasta in a large pot according to the packaging directions. I just boiled the water with some salt, can't go wrong... Be careful not to overcook though!
*Remove the pasta and rinse under cold water. Drain. Then toss the pasta with 1 Tbsp oil. Set aside.
*Put your chicken breasts, uncooked, into the large skillet pot (without the pasta...). Pour the chicken stock over the chicken.
*Bring chicken stock and chicken breasts to a boil. Once it is boiling, turn it all the way and simmer the chicken (cook on really low heat) for 30 minutes, covered.
*Dice up all of your celery stalks, onion, and green pepper.
*After simmering for 30 minutes, turn off the heat. Leave chicken in the pot, still covered with a lid, for another 30 minutes. Hey, I told you it takes a bit of time to make this thing...but it is well worth it in the end! Homemade soup is amazing...
*After these 30 minutes, remove the chicken and shred it. You should be able to take two forks and just pull it all apart. Put the chicken back into the pot with the chicken juice/broth.
*Heat 1 Tablespoon of olive oil in a small pan. Add the oregano and then turn off the heat. Stir constantly for about 1-2 minutes to make sure it doesn't burn. Set aside...and sorry for all these dishes. :)
*Another skillet please. Okay, put your onions, celery, peppers, and 1 Tbsp oil into the skillet/pan. Cook these on medium heat for about 10 minutes. Stir often so they do not burn. Once done, pour into the pot with the shredded chicken and chicken juice.
*Pour the tomatoes and their juice (so undrained tomatoes) into the chicken broth mixture. Now add the oregano mixture (I left out a little bit because the smell was SO strong, I didn't want the soup to be all oregano).
*Pour the cooked pasta into the soup mixture. Add the cream and the olive oil. Stir well.
*Bring mixture to a boil. Once it is boiling, turn it off.
*Serve soup with LOTS of Parmesan cheese on the top. If you have crusty bread, serve that with it. Its delicious when the bread soaks up the oil at the top of the soup, oh my! :)
Wednesday, January 4, 2012
:(
I'm sorry I haven't posted in forever! I promise to hurry and start posting again soon. I HAVE been cooking...but it is either recipes I have been asked not to share or it is recipes that I don't think are very good and wouldn't recommend ya'll trying! Stay with me, I'll be posting again soon!
Monday, December 12, 2011
Taco Cornbread Bake
My friend Misty made this recipe and said how yummy it was on her facebook wall. Of course, I had to google it and look it up. HOLY yum! We had it for dinner tonight and really liked it! The cornbread topping was awesome because it was a sweet flavor on top of the spicy mexican under layers. Loved this one!
Ingredients:
1 lb ground beef
1 Packet of taco seasoning
1/3 Cup water
1 Can of Rotel, drained
1 Can black beans, drained and rinsed
1 Can corn, drained
1 Box Jiffy cornbread (plus the ingredients called for on the package)
1 - 1 1/2 Cups shredded cheese
Salsa and sour cream to top it off
Directions:
*In a pan, cook your ground beef on top of the stove. Then drain the juices/fat out.
*Put your taco seasoning and water into the cooked and drained beef. Stir well. Simmer/cook for 2-3 minutes.
*Pour your beans, Rotel, and corn into the ground beef mixture. Stir it up well.
*Add half of your cheese to the meat mixture. Stir it up.
*Spray a square baking dish down with cooking spray.
*Turn your oven on to 400*F.
*Make your Jiffy according to the package. (Mine called for one egg and 1/3 a cup of water. I let it sit a couple of minutes, then stirred it up again.)
*Pour your meat mixture into the baking dish. Pour the cornbread on top of the meat mixture.
*Place dish into your oven and bake for 20 minutes.
*After the 20 minutes, pull it out and top it with the remaining cheese.
*Put back in the oven for 2-4 minutes until the cheese has melted.
Be careful, it is really really hot to the touch when it comes out of the oven! Top it with sour cream and salsa. Enjoy!
Subscribe to:
Posts (Atom)